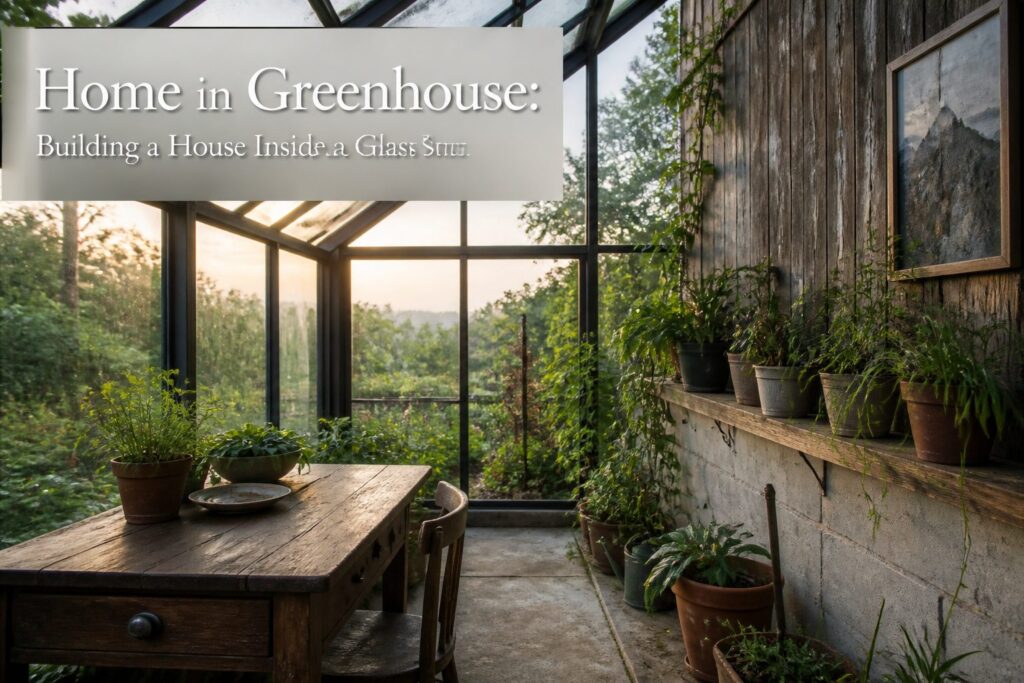
A home in a greenhouse is a living space built inside or against a glass structure that traps solar heat and extends the growing season around your daily life.
Humidity is the problem: one person breathing and showering adds pounds of water vapor daily, and without deliberate venting you get a mold incubator with a sofa in it.
The wall goes four feet down to bedrock, below the frost line, with a solid footing under pour.
[link-whisper-related-posts]Planning the Location
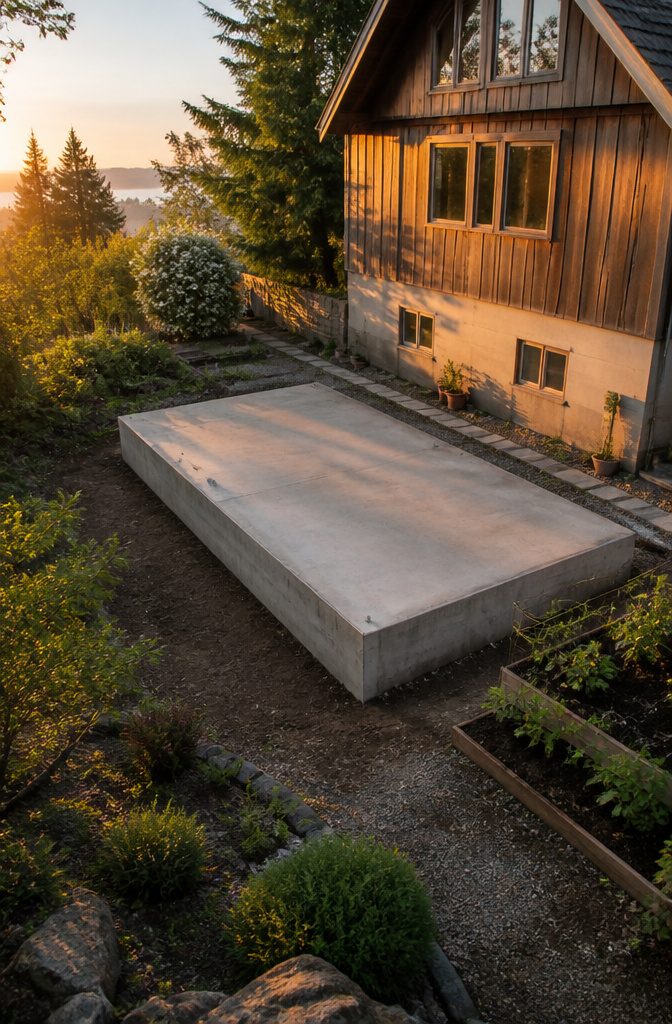
A south-southwest wall catches the longest stretch of winter sun, and that exposure is the deciding factor for where a greenhouse home goes.
The ideal is true south, but few lots line up clean with compass points; southwest runs a close second, and in many yards it wins outright for the exposed foundation already sitting there.
I would take the wall with the most unbroken foundation line over one that faces south but runs short.
Existing windows matter too. Slightly below them keeps the house’s upper wall intact for attaching the greenhouse roof; just above works if you need the headroom.
Slightly under the roof overhang is possible, though I tend to skip it unless the overhang is deep enough to shelter the greenhouse junction without trapping condensation.
What you get from each option is a trade between sun penetration and how much heat the cellar wall can store: a lower greenhouse floor, pulled down to several feet below outside grade, turns that cellar wall into a heat sink and bermed earth into free insulation.
That decision alone shapes every step after it, from how deep you dig to whether the bulkhead stays or becomes a vent.

Excellent Performance: The upgraded thermostat/humidity controller can easily set the desired start-up temperature at any temperature between 60°F-120°F, recommended setting 100-110°F; Humidistat Setting Range: 30%-90%, you can use it to control your ventilation equipment to maximize energy savings and ensure indoor safety

【Smart Temp & Humidity Control】 Set your ideal environment and let the fan do the rest! This smart exhaust fan features fully customizable high and low-temperature modes. It automatically kicks on when the climate exceeds your set high-temp or drops below your low-temp threshold, ensuring optimal ventilation 24/7.

【Ultra Quiet Brushless Motor】Equipped with an advanced brushless motor, this upgraded solar exhaust fan significantly reduces noise and vibration, operating at ≤36dB. It's quiet enough for use in chicken coops, pet houses, and greenhouses without disturbing animals. The motor ensures smoother performance, longer lifespan, and improved durability—perfect for long-term summer ventilation in outdoor settings.
Foundation Below Frost Line
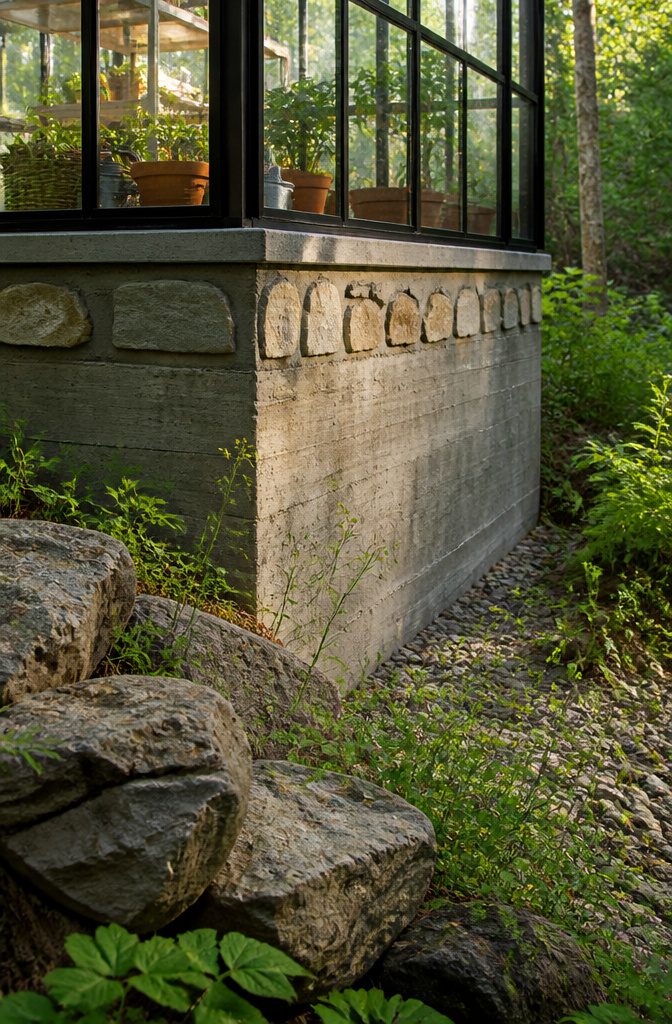
A permanent greenhouse home needs a foundation that acts like a house foundation, not a garden shed pad. The wall goes four feet down to bedrock, below the frost line, with a solid footing under pour.
I would use poured concrete or a dry-stacked block wall with every core filled with rebar and concrete for the load, and I would embed threaded lag bolts in selected cores so the wall plates above have something to bite into.
On the outside, a one-inch layer of Styrofoam board against the block keeps ground-coupled cold from migrating inward.
A dry-laid stone wall against that adds mass and sheds water. This three-sided foundation wall does more than carry weight; it isolates the soil inside, holds some of the greenhouse heat, and keeps frost and tunneling animals out.
The glass above is fragile and expensive, so the base beneath it has to be absolute.

✅Thick Heavy-Duty Galvanized Steel Structure for Long-Lasting Reusable Use: Thick-walled adjustable wall brace steel tube weighs up to 16 lbs, Super Solid TurnBuckle & fully welded seamless joints effectively prevent bending, deformation and cracking under concrete lateral pressure.Hot-dip galvanized finish resists cement slurry, rainwater and mud corrosion on job sites, no rust or thread jamming after repeated turnover.

EXTREMELY EFFECTIVE - Reflects 95% of radiant energy, perfect RADIANT BARRIER. R17 insulation.

Christian Mason Jesus Christ Construction Worker. This Every Foundation Poured With Prayer is for a concrete worker who accept Jesus Christ as their Lord and Saviour. Great for a concrete builder attending a bible study or prayer meeting.
Framing and Glass
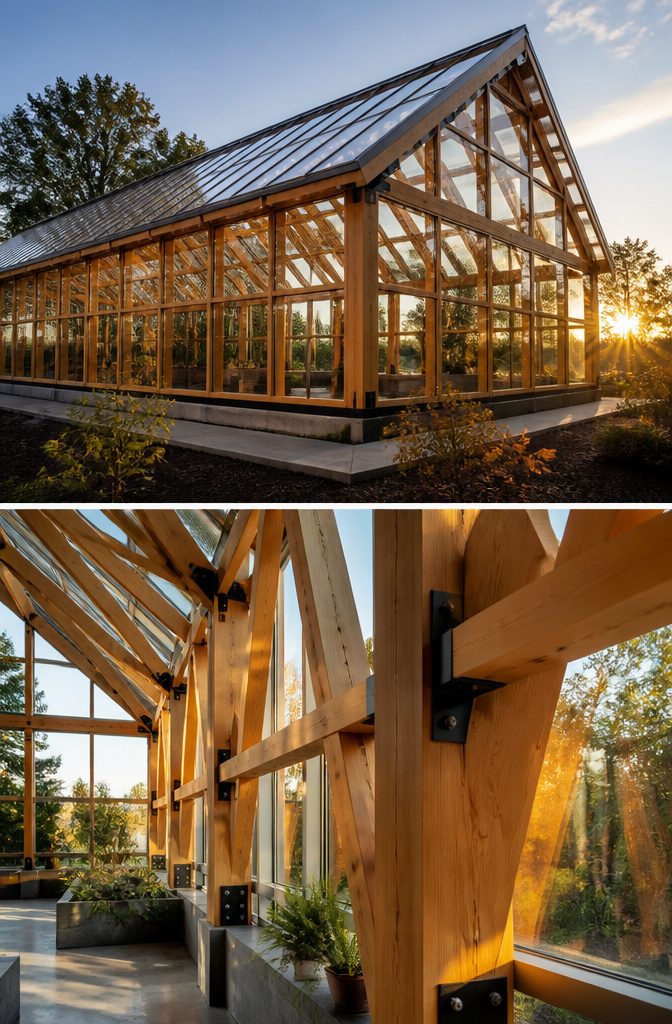
Lumber framing for a greenhouse this size needs to be real framing, not garden-tier construction.
I would build the perimeter in 2×6s, same as the window wall in a standard house addition, because the glass load and wind load are real loads.
The bottom plate bolts to the foundation with lag bolts, and the top plate gets a 2×8 to give the roof joint something to sit on.
At 50 feet long by 9 feet wide, you are looking at roughly 450 square feet of floor and about 3,000 cubic feet of air inside; that volume is what you are insulating, so the glass choice matters more than the frame lumber.
Double-glazed tempered glass is the standard I would hold out for. Single pane in a space this size costs you every night from October through April.
The specific size to watch for is 34 by 75 inches, because that is sliding-door glass, and sliding-door glass is mass-produced, which means replacement units circulate when the seal fails and the pane fogs.
A fogged double-pane unit can be split into two single tempered sheets, each giving you about seventeen square feet of very tough glass.
I have tracked these through glass dealers and contractors hauling out old units; the economics beat buying new retail by a factor I would rather not calculate.
The roof is where I spend the money without hesitation.
Wall glass can be salvaged, swapped, or patched. Roof glass that leaks or cracks in a January ice storm ruins the project underneath it.
Triple-track storm windows installed on their sides, screens and locks intact, make decent operable wall panels for summer ventilation. The roof gets new double-glazed tempered units, period, and the slope gets calculated for snow load and runoff both.

[High Transmittance & UV Protection] Made of optical-grade material, this polycarbonate sheet has over 90% light transmittance. Sunlight slips through easily, giving plants a full "sunbath" for photosynthesis. Its UV-resistant coating blocks 99% of UV rays—no wilting plants, and unlike low-quality greenhouse plastic, it won’t yellow or age.

Polycarbonate Panels: The greenhouse roof panels allow 80% light transmission into the greenhouse, which greatly benefits plant growth. Polycarbonate roof panels are different from traditional iron sheds as they are less prone to water seepage and provide ample sunlight for the plants

[GREENHOUSE REPAIR] Made of optical-grade material, this polycarbonate sheet has over 90% light transmittance. Sunlight slips through easily, giving plants a full "sunbath" for photosynthesis. Its UV-resistant coating blocks 99% of UV rays—no wilting plants, and unlike low-quality greenhouse plastic, it won’t yellow or age.
Vents and Air Circulation
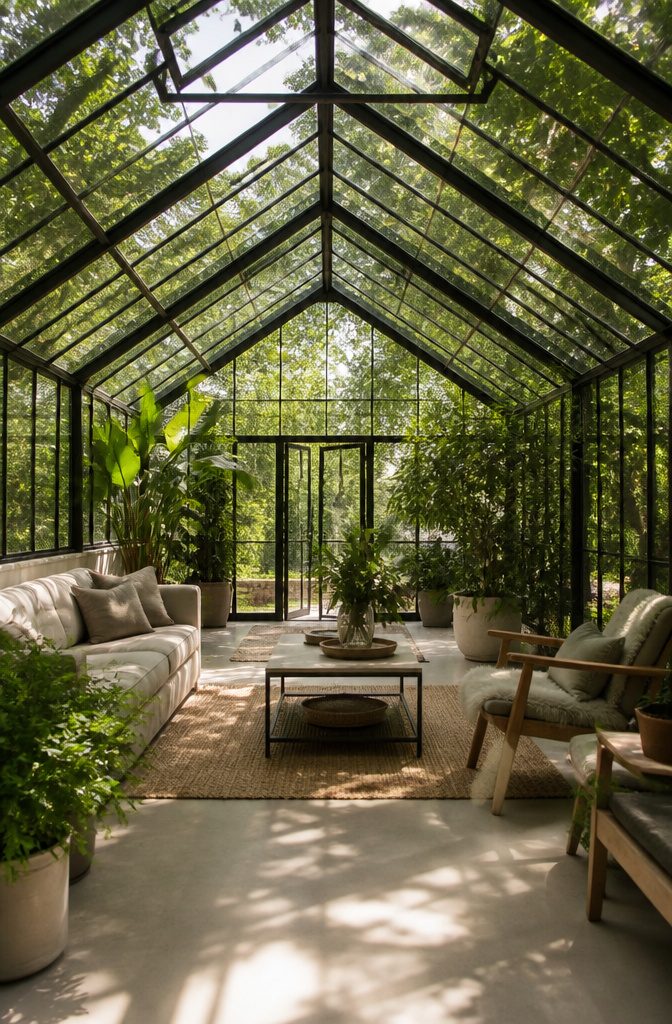
A home in a greenhouse lives or dies on air movement the way a standard house lives or dies on its roof.
Without planned airflow, you do not get a living space; you get a mold incubator with a sofa in it.
Glass traps heat and moisture.
One person breathing and showering adds pounds of water vapor daily, and plant transpiration adds more. That humidity lands on every surface.
Cool night glass makes those surfaces sweat, and still air lets spores take hold inside walls long before you see them on the outside. The smell arrives first; the structural damage follows.
The answer is deliberate venting, not one window cracked on hope.
An attached greenhouse serving as living space needs at minimum a screened passageway door, a solid interior door for seasonal closure, and small vents between zones with operable covers you actually use.
Two 6-inch wall vents per 450 square feet gives you something to work with, though cross-ventilation through opposite walls beats any single opening.
Roof vents that open automatically by heat expansion cost more upfront than a manual window but they work while you are at work.
I would place low intakes on the shaded side and high exhausts at the ridge. That stack effect pulls cooler ground-level air across living areas and dumps the hottest, wettest air where it wants to rise anyway.
Skip powered fans unless your site has no cross-breeze at all; they break, they cost to run, and they are noise you cannot turn off.
A door on each end wall, not just the house connection, turns a greenhouse into a space you can flush entirely on a September afternoon when the temperature spikes.
That third door is what separates a greenhouse you visit from a greenhouse you live in.
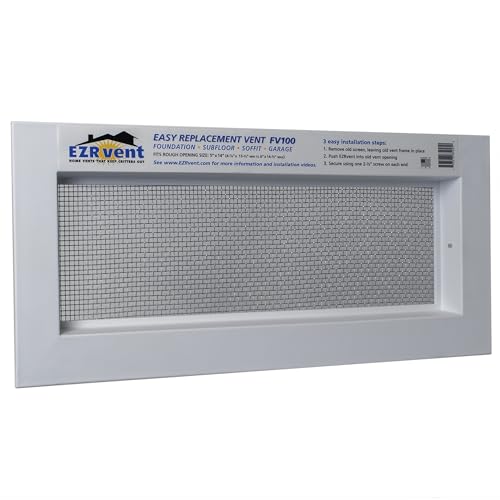
5 x 14 INCH SIZE covers a range of rough openings (Height: 4.5” to 6.5" Length: 13” to 14.5")

【FITS 16”x8” OPENINGS】 Includes a convenient 2-pack of crawl space vent covers, each measuring 16.1" x 9.2" overall. Fully engineered to fit standard 16" x 8" rough foundation wall openings. Note: To ensure proper alignment and a secure fit, please measure your crawl space vent opening size prior to ordering.

【Replace】The Foundation Auto Vent Replace manual vents. Fits standard 8 X 16 inch vent openings. Automatic replacement foundation vent for ventilating crawl spaces. Automatically fully opens at approx.70°F and closes at approx.40°F. Saves energy and lower risk of frozen pipes. Helps prevent foundation decay. 57 square inches of net free ventilating area. Quality you can trust.
Plumbing and Electrical
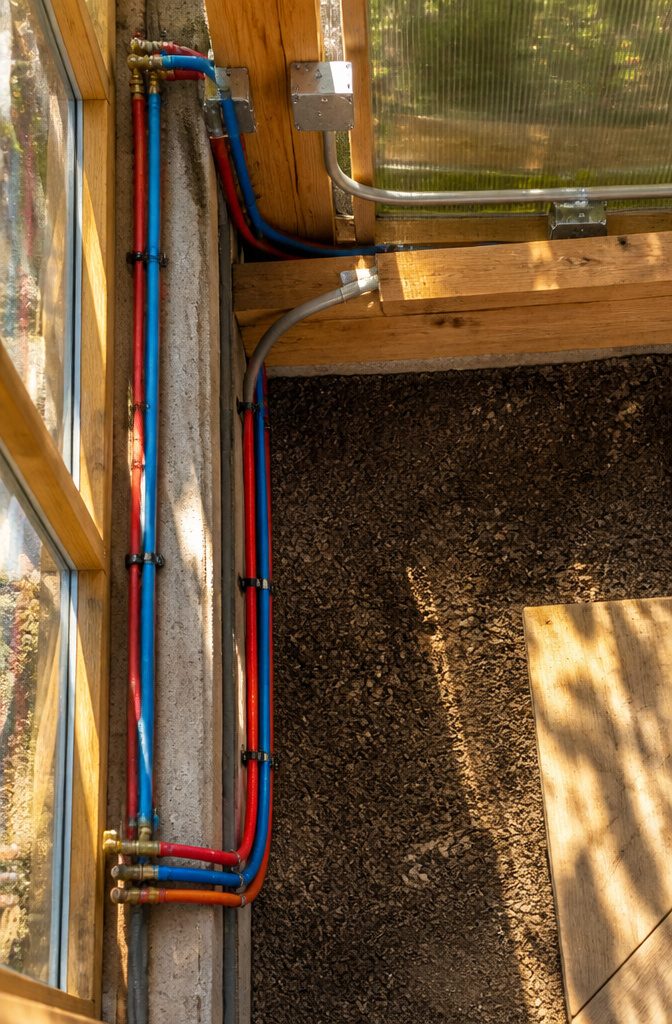
The difference between a greenhouse you visit and a greenhouse you live in comes down to bringing water and power all the way to where you plant.
I would run both systems off the house’s main lines rather than treating this as an outbuilding with its own meter, which most local codes will require anyway if you’re calling it living space.
The utility work is where budget projects die, because trenching for a water line to a detached greenhouse runs past what most weekend builds can absorb.
If you’re attaching to the house, tap off the nearest bathroom or kitchen wall, run PEX through the shared wall, and stop there.
For water, a single cold line with a hose bib handles most greenhouse living if you don’t plan a full kitchen out there.
A sloped trench under the foundation wall (your contractor handles this when they pour) carries drain pipe out before the slab goes in.
Skip a water heater in the greenhouse itself and instead run a recirculating loop from the house if you want warm water for plants or hand washing; a small tank under a sink freezes in January and steams up the glass in July.
Lighting changes everything about how usable the space feels after 4 p.m. I would run conduit for LED fixtures on dimmers, wired to a switch at the house entry so you’re not walking into a dark glass box.
A separate 20-amp circuit for a small heater or fan is worth the extra wire now, even if you don’t need it the first season.
Most attached greenhouse builds I have looked at skimped on outlets and ended with extension cords across wet floors.
The code inspection here is usually just one: electrical rough-in before you close the interior walls, if you frame any.
Open the conversation with your inspector early, because treated as a sunroom your greenhouse gets different rules than treated as a shed.

【Powerful Ventilation】- Ehiair 8-inch shutter exhaust fan delivers a strong 760 CFM airflow to quickly remove heat, humidity, smoke, dust, and odors, helping improve air circulation and overall air quality. Ideal for garages, attics, greenhouses, workshops, sheds, basement, and chicken coops to keep your space ventilated and cool
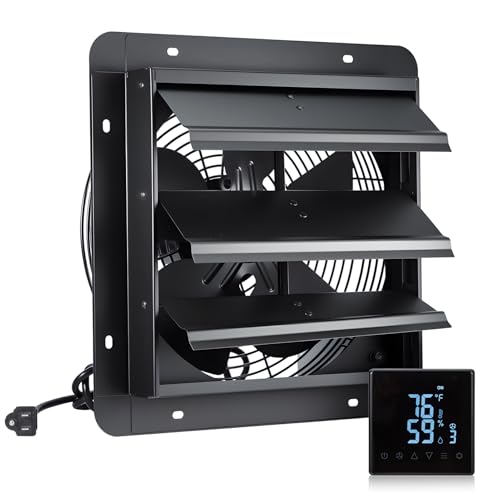
1200 CFM Strong Ventilation: Our shutter exhaust fan delivers 1200 CFM airflow, effectively removing stale air, heat, and humidity from large areas like greenhouses, garages, and barns. It covers up to 1400 sq. ft., ensuring rapid air exchange for a fresher, more comfortable environment

【Massive 1282 CFM Airflow & Wide Coverage】Dominate the heat with a powerful 1282 CFM airflow capability. Driven by a high-speed 1858 RPM motor, this heavy-duty garage exhaust fan rapidly refreshes air in spaces up to 1600 Sq.Ft. It’s engineered to clear a standard 2-car garage in just 3 minutes, making it the ultimate solution for removing heat, odors, and moisture from workshops, greenhouses, or large sheds.
Shelves, Planting Areas, and Living Space
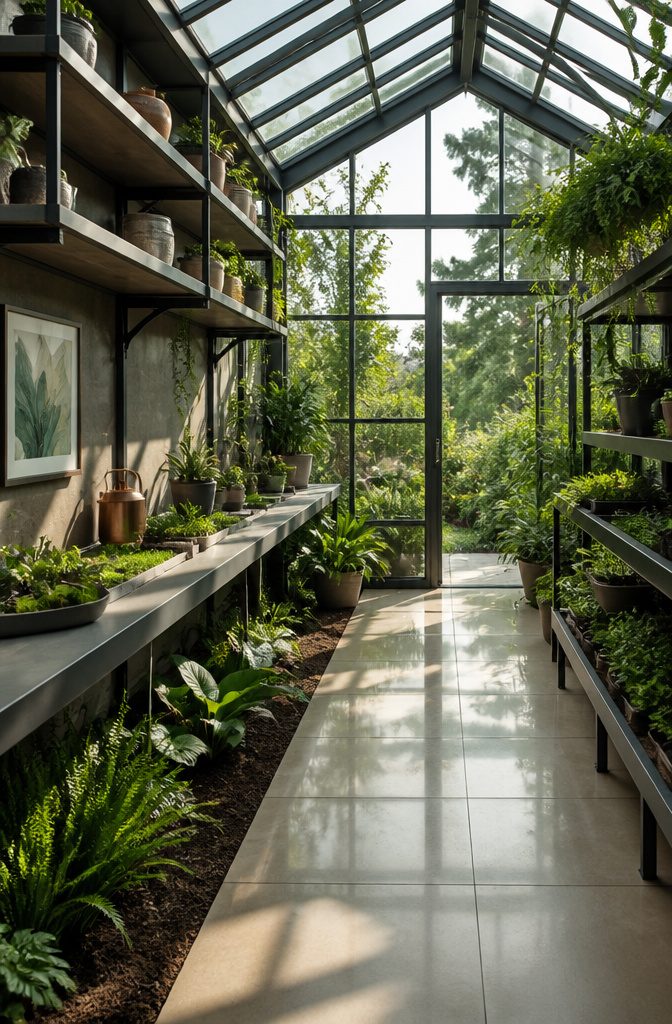
Shelves in a greenhouse home need to work harder than standard storage. I would run fixed benches along the north wall at counter height, 36 inches, and keep them shallow, 18 inches front to back, so light still reaches anything below.
The south wall is where I would put tiered staging for actual growing, with slatted surfaces that drain and let air move through pots.
For living space, the distinction between a greenhouse and a sunroom collapses fast. A hammock only works if you have the headroom, which means planning the ridge height before the frame goes up.
I would skip hanging chairs that bolt to the glazing; they stress the frame and leak heat around the mount. Instead, a low daybed on casters can roll to follow winter sun or retreat under shade in July.
The floor material matters more than the furniture.
Stone or tile holds thermal mass and stays cool underfoot when summer overheating hits. Wood feels warmer but rots where watering spills, and in a space built around plants, spills are constant.
I would budget for porcelain tile with some texture, not polished, and put the savings toward a single decent cushion rather than a matched set that mold claims within two seasons.

Christian Mason Jesus Christ Construction Worker. This Every Foundation Poured With Prayer is for a concrete worker who accept Jesus Christ as their Lord and Saviour. Great for a concrete builder attending a bible study or prayer meeting.

Christian Mason Jesus Christ Construction Worker. This Every Foundation Poured With Prayer is for a concrete worker who accept Jesus Christ as their Lord and Saviour. Great for a concrete builder attending a bible study or prayer meeting.

Christian Mason Jesus Christ Construction Worker. This Every Foundation Poured With Prayer is for a concrete worker who accept Jesus Christ as their Lord and Saviour. Great for a concrete builder attending a bible study or prayer meeting.
Attached or Detached
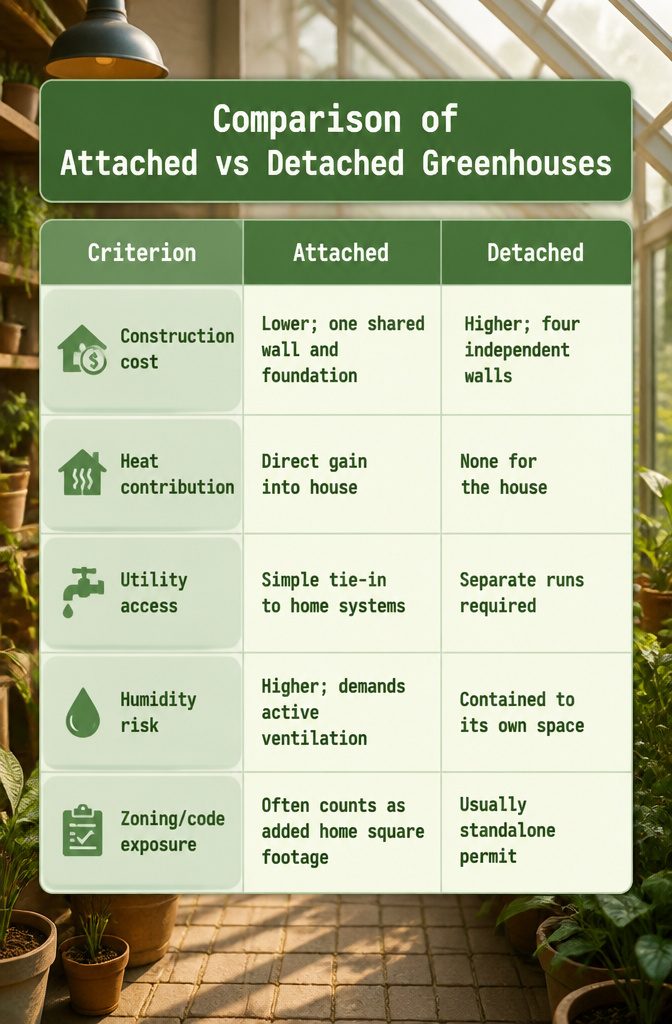
An attached greenhouse leans on one wall of your existing house and shares its roofline, which cuts material costs by roughly one full wall and foundation compared to building a separate structure.
You also gain passive heat; one northern homeowner heats a 3,000-square-foot house with four to five cords of wood per year while the greenhouse supplies the rest of the load, saving around $1,000 to $1,250 in a single winter.
Running utilities gets simpler too, since electrical and plumbing systems sit a few feet away.
Detached gives you freedom. You choose the orientation, control humidity risks, and avoid having your main house treated as a single taxable structure or subject to residential code on the entire footprint.
You pay more up front and you lose the free warmth that bleeds through a shared wall.
| Attached | Detached | |
|---|---|---|
| Construction cost | Lower; one shared wall and foundation | Higher; four independent walls |
| Heat contribution | Direct gain into house | None for the house |
| Utility access | Simple tie-in to home systems | Separate runs required |
| Humidity risk | Higher; demands active ventilation | Contained to its own space |
| Zoning/code exposure | Often counts as added home square footage | Usually standalone permit |
I would build attached if my goal was heating the house and keeping the budget under a strict weekend-project ceiling.
The detached route wins if I lived too far south to need the extra heat, or if local zoning would tax me on every square foot under glass.

4ft x 2ft Polycarbonate Panels: Each polycarbonate greenhouse panels is precision-cut to 4ft x 2ft (48" x 24"), the most common size for standard greenhouse frames. The lightweight material of polycarbonate panels is easy to handle yet rigid enough to provide structural integrity once installed

UV-Resistant and Light Transmittance: These polycarbonate greenhouse panels allow 80% of light transmission, helping plants receive optimal sunlight for growth while protecting them from harmful UV rays. Ideal for creating a bright, healthy environment for your garden or greenhouse.

Protect Plants: Upgraded double-layer design polycarbonate roof panels provide better thermal insulation effect. It create the ideal environment for plants to thrive and reduce the temperature of the greenhouse in the summer and keep it warm in the winter
Temperature and Humidity Control
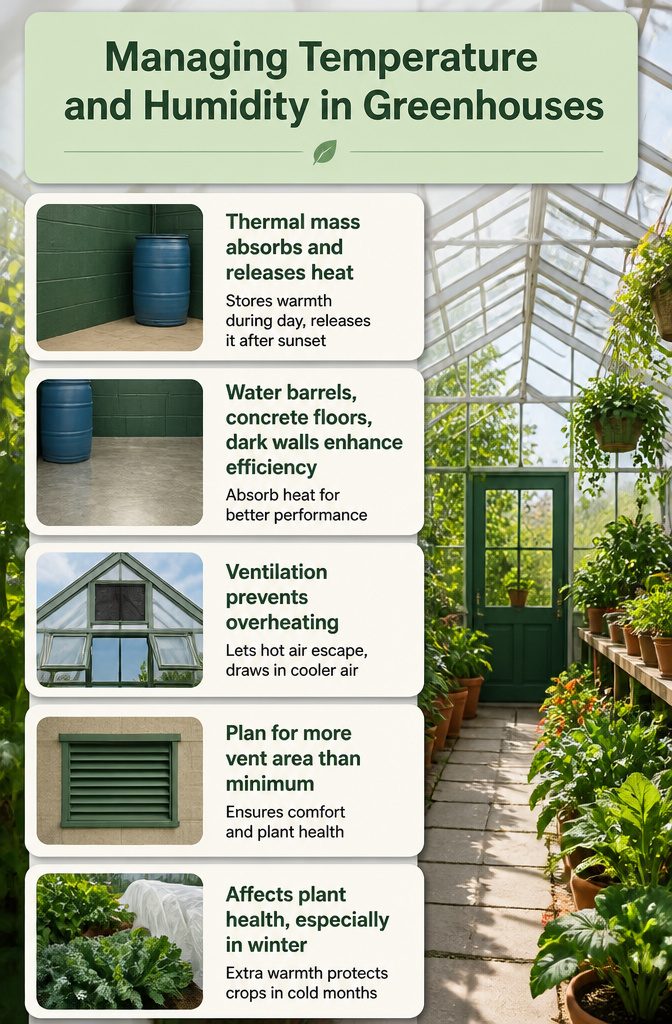
Thermal mass is what separates a greenhouse that moderates temperature from one that swings wildly between noon and midnight.
Water barrels, concrete floors, or a masonry wall painted dark green for solar gain absorb heat during the day and release it slowly after sunset.
In a harsh climate, that stored warmth can keep cool-weather crops alive from late fall into early spring, though even cool-weather crops sometimes need covering from late December to early March.
Summer is the opposite problem.
Without ventilation, a glass structure overheats fast. Screened vents high on the south-facing wall, plus operable windows or doors on each end, let hot air escape while drawing cooler air through.
I would plan for more vent area than the minimum, because an overheated greenhouse in July is useless for plants and miserable to live in.
For scale, a 3,000 square foot house in the north country needs four to five cords of wood at about $250 per cord to cover roughly half its annual heating.
An attached greenhouse supplying the other half saves $1,000 to $1,250 in a single winter. That is real money, but it depends on the greenhouse performing year-round, which means the thermal mass and ventilation have to work together.

SURFACE MOUNTED DESIGN: Easily attach to the outside of your crawl space foundation wall, covering 8"x16" openings securely with screws or adhesive (not included).

SURFACE MOUNTED DESIGN: Easily attach to the outside of your crawl space foundation wall, covering 8"x16" openings securely with screws or adhesive (not included).

Size- 16"x8"x1/2" made of ABS paintable open area 38.2 sq. in, metal screen, anodized, no rust issue, install with 6 screws(not included) or silicon. $29.99 for one vent
Growing Seasons and What Thrives
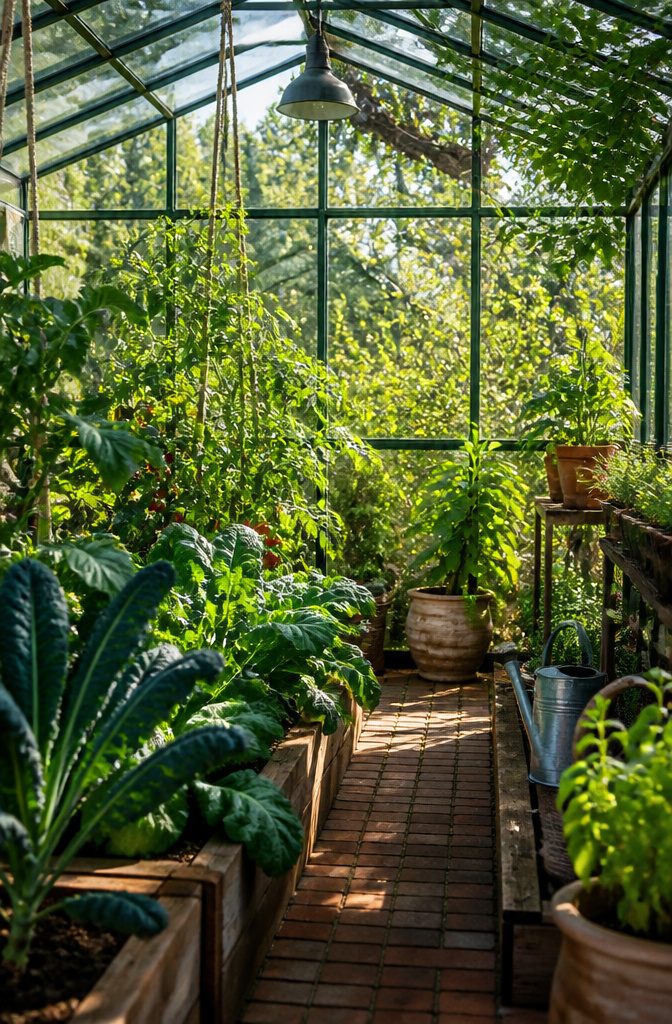
A greenhouse wrapped around your living space buys you months on both ends of the growing season.
In most of the country, that means starting tomatoes and peppers in March while your neighbors wait until May, and keeping lettuce and kale alive well past the first frost.
The glass traps enough solar gain that soil temperatures stay workable when outdoor beds have gone cold and hard.
What you can grow depends on how you manage that heat.
Citrus and figs that would die in a New England winter stay productive in an unheated greenhouse, though they need a sunny south wall and protection from the glass on the coldest nights.
Tropical plants, orchids, and certain herbs like lemongrass ask for more, and I would only commit the floor space if you are running some form of backup heat.
A lemon tree looks spectacular against a kitchen window, but it ties up square footage that could hold a dining table or a row of salad greens you will actually harvest.
For most first-time builders, I would start with the cool-season crops and hardy perennials that forgive inconsistent temperatures.
Tomatoes and cucumbers reward you quickly, and climbing varieties trained overhead leave the floor open for living space. Root vegetables struggle in containers, so I would skip them unless you are building deep raised beds as part of the foundation.
The plants that thrive are the ones matched to the temperature range your structure naturally holds, not the ones you wish it would.

Powerful Ventilation: Equipped with a high-performance motor, this gable attic fan delivers strong airflow for rapid indoor ventilation in attics, garages, warehouses, workshops, and other spaces
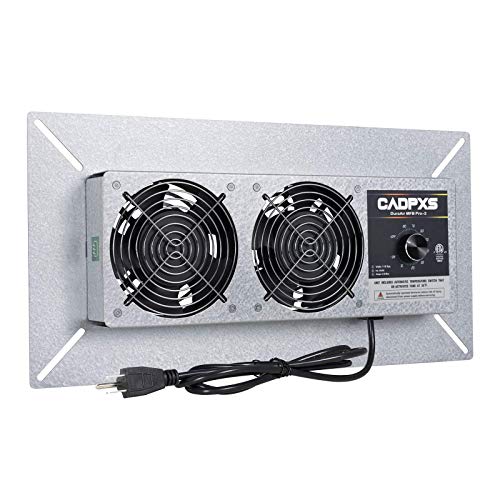
Crawlspace Vent Fan: Air Out. Airflow: 220 CFM. 18" x9" x2”. Dual fans with 6.56 foot grounded power cord. Ventilate a wet crawl space. Exchange the outdoor and indoor air, improve room air quality and balance the humidity

Premium Material: Made of high-grade galvanized sheet, this high-quality shutter louver vent is easy to install and maintain, durable and corrosion-resistant.
Ideas From Built Examples
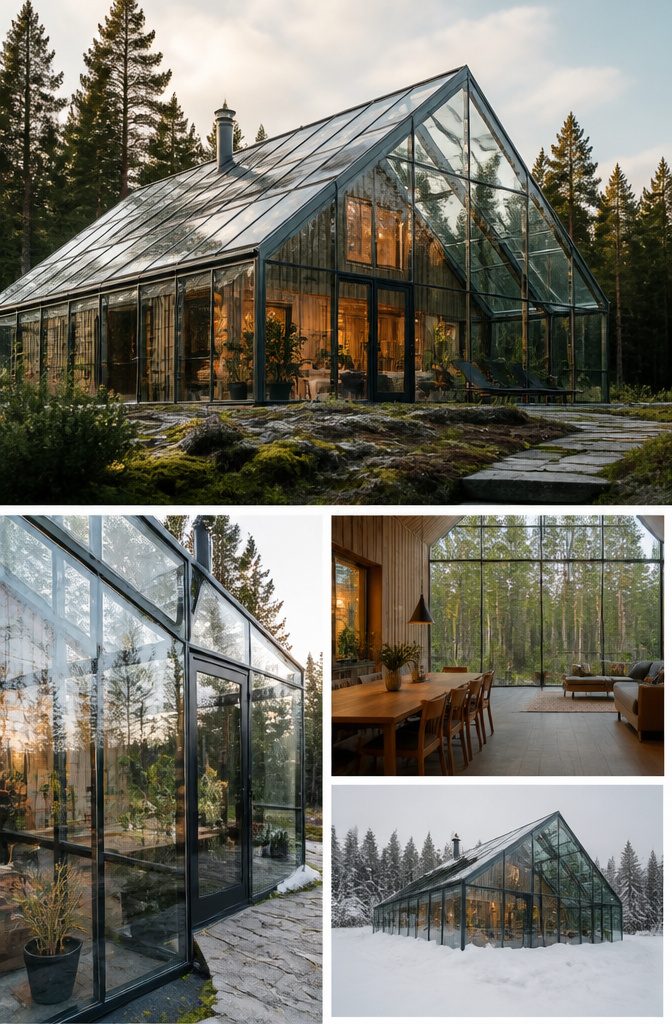
Built examples show what actually works when a home sits inside or beside a greenhouse structure.
- The eco-luxury home in Sweden wraps a glass envelope around the house itself. The greenhouse shell collects solar gain through the long northern winter, and the inner house needs less waterproofing since the outer glass takes the weather hit. The glass has to handle real wind loads, and cleaning that much roof glass is a recurring chore.
- An attached solar greenhouse on the south wall functions as a permanent heat source. It buffers the main house from cold air while feeding warmed air inside. I would pick this for a first project because it uses standard greenhouse hardware rather than engineering a full building envelope.
- The aquaponic herb garden pairs fish tanks with planting beds in a greenhouse that serves as working farm infrastructure. One Indiana property on a 20-acre lot runs exactly this setup:
A greenhouse that’s currently being used as an aquaponic herb garden comes with the purchase of this three-bedroom home.
For a reader already keeping a koi pond or raising tilapia, this is the step that turns a hobby into a food source.
- The historic home with greenhouse doubling as sunroom shows how to graft new function onto old bones. A 1797 Plymouth, Massachusetts house uses its greenhouse as occupied living space through winter months. Cedar-shake siding and original crown molding stay intact; the greenhouse just extends the usable season.
- The detached greenhouse keeps gardening separate from daily living. It complements rather than engulfs the house, which means simpler permits and no need to reconcile humidity levels where you sleep. I would skip this if you want passive heating, but it wins for keeping soil and pests out of the main structure.

Christian Mason Jesus Christ Construction Worker. This Every Foundation Poured With Prayer is for a concrete worker who accept Jesus Christ as their Lord and Saviour. Great for a concrete builder attending a bible study or prayer meeting.

Christian Mason Jesus Christ Construction Worker. This Every Foundation Poured With Prayer is for a concrete worker who accept Jesus Christ as their Lord and Saviour. Great for a concrete builder attending a bible study or prayer meeting.
Frequently Asked Questions
What are the benefits of living in a greenhouse?
A home in a greenhouse can cut heating costs by $1,000 to $1,250 in a single winter by collecting solar gain that feeds warmed air into the main house.
You also get extended growing seasons, starting tomatoes in March and keeping greens alive past first frost.
The glass shell takes the weather hit so the inner house needs less waterproofing, and the structure buffers the main house from cold air.
How do you manage humidity in a greenhouse?
Planned airflow is non-negotiable; without it you get a mold incubator rather than living space.
Two 6-inch wall vents per 450 square feet is the minimum workable amount, with low intakes on the shaded side and high exhausts at the ridge to exploit stack effect.
Automatic roof vents that open by heat expansion work while you are away, and a door on each end wall lets you flush the entire space on hot afternoons.
What materials are best for greenhouse construction?
Double-glazed tempered glass is the standard to hold out for, especially 34 by 75 inch units from sliding doors because replacements circulate cheaply when seals fail.
For the roof, buy new double-glazed tempered units without hesitation; wall glass can be salvaged or patched, but roof failure in a January ice storm ruins everything underneath.
Perimeter framing should be 2×6 lumber, same as a standard house addition, because wind loads and glass loads are real structural loads.