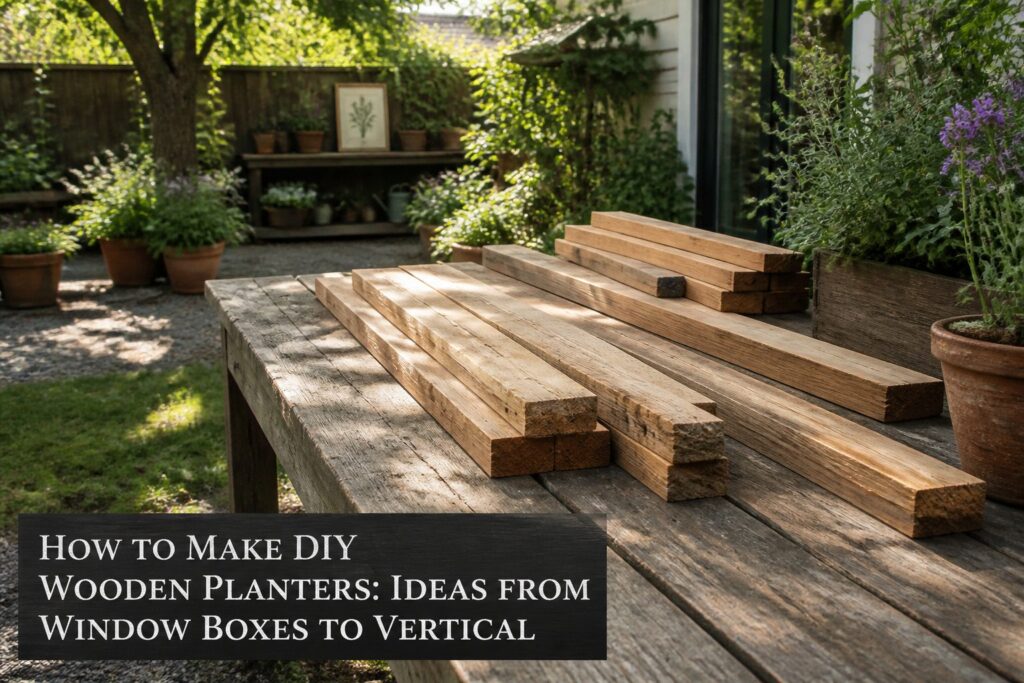
Six finished wooden planters, from a window box to a vertical wall unit, will cost you one Saturday and roughly $300 in cedar if you build smart.
Most people get the wood choice wrong at the start and spend that savings twice over on replacements.
Cedar picket fence posts cover multiple boxes for around that $300, and they carry their own defense against rot without the plastic liner that turns pressure-treated lumber into a fussier project than it needs to be.
[link-whisper-related-posts]1. Choose Your Wood
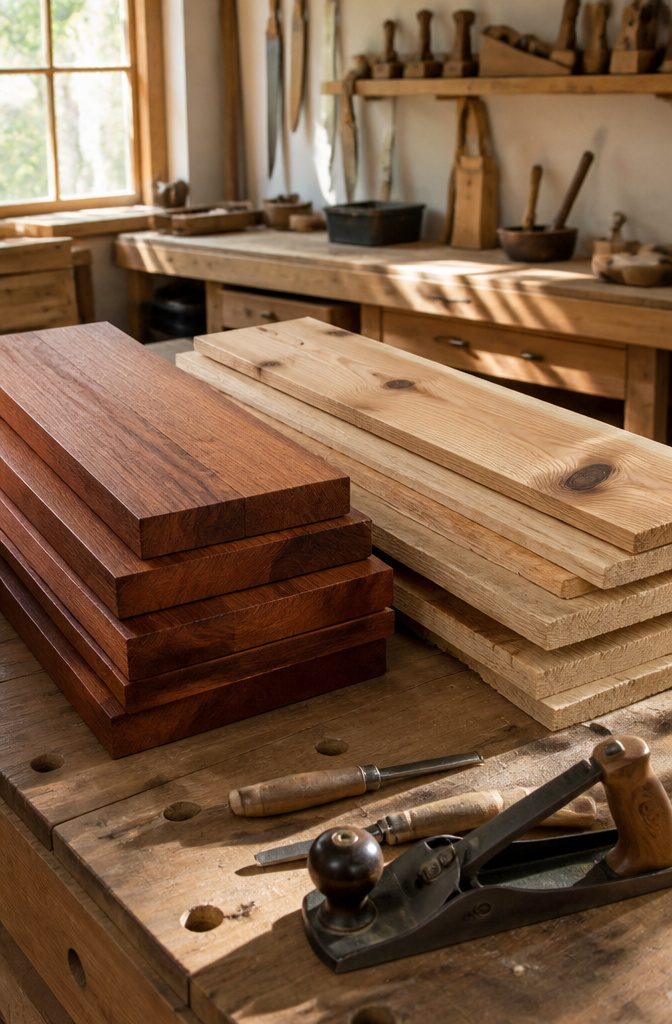
Cedar and redwood carry their own defense against rot and insects, so they age quietly without much help from you.
Between the two, cedar wins on price: a run of cedar picket fence posts covers multiple boxes for around $300, which is hard to match with anything else worth building from.
Redwood performs nearly as well and looks richer doing it, though it costs more and the gap in longevity is small enough that I would skip it unless the planter sits somewhere highly visible.
Repurposed wood, old decking or pallet stock, saves money upfront and suits a temporary or experimental build.
Uncertainty is the real problem; you cannot know what it has weathered or what it carries until it fails. I would use it for herbs or annuals, not for a box I expect to last.
Pressure-treated lumber is the budget choice that shows up everywhere, but the chemicals that keep it from rotting will leach into soil and roots without a plastic liner.
That liner adds a step, traps its own moisture against the wood, and turns a simple build into something fussier than it needs to be.
For the small premium cedar asks, I would rather start with wood that does not need a barrier between it and the dirt.

Elevate Your Garden - Opt for a brilliantly engineered raised garden bed to revolutionize your gardening. Its spacious design, measuring 48x24x30 inches, allows for the cultivation of multiple vegetable varieties alongside a plethora of herbs, optimizing your gardening space for ease and diversity.

100% Cedar Wood: Our garden bed is constructed using sustainably sourced cedar wood, known for its durability against the elements.

Set of 2 square planter boxes made from dark red meranti wood with teak oil finish
2. Determine the Size
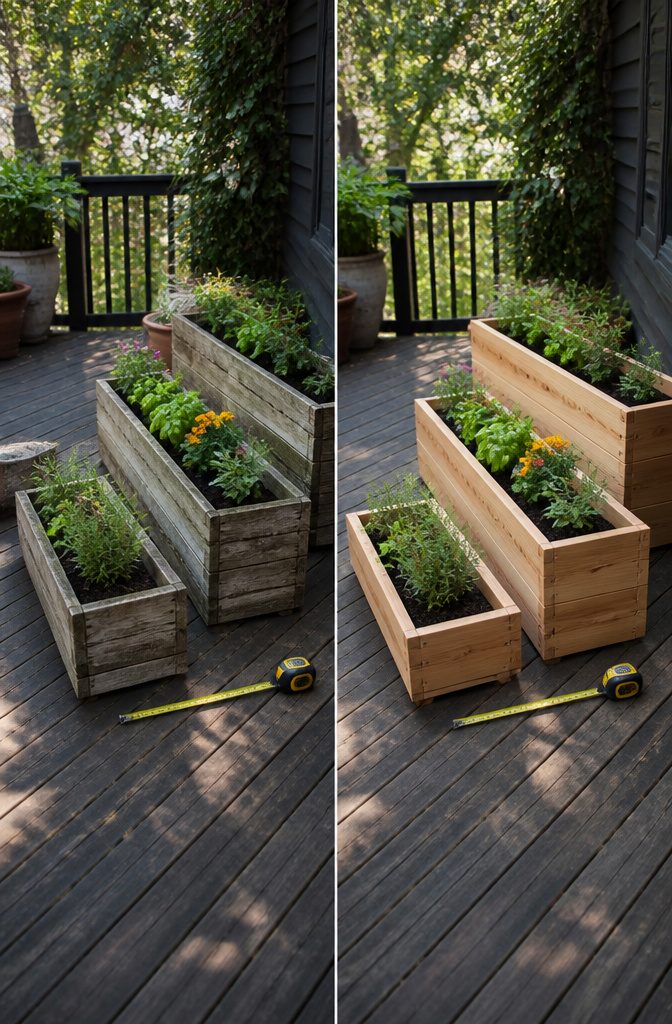
A planter too big for the space looks like a bathtub; too small and it dries out before lunch.
The three sizes I actually build are 4 feet by 2 feet, 6 feet by 2 feet, and 8 feet by 2 feet, depth held steady so the math stays honest.
The small box fits 12 to 16 plants, the medium 18 to 24, the large 24 to 32. I pick by walking the spot and counting steps, not by what looked right in someone else’s photo.
The 4′ × 2′ is what I use when floor space is borrowed from a walkway or a balcony that’s already doing three jobs.
The 6′ × 2′ hits a balance I end up at most often: enough soil mass that cherry tomatoes don’t pout, not so much that filling it breaks the budget.
The 8′ × 2′ only happens when I have a wall or fence to anchor against and enough sun that 32 plants won’t shade each other into a sulk.
Most deck boards and common timber sticks hit these lengths without waste, which matters when you want a Saturday project, not a milling operation.
Skip the 2-foot depth bravado; anything deeper than 24 inches fills with soil you don’t need and weight you do not want to move.

Space-Saving Design with a Natural Matte Finish: Features a versatile design that maximizes your outdoor space while providing an attractive natural matte appearance

Balcony Rail Planter: Rectangular outdoor planters was designed to maximize inside growing space allowing dirt and roots to grow strong and deep.This special design can be hung on the balcony, window, garden,railing, anywhere in the room,also can be used as desktop.

✔️WHAT IS INCLUDED? Wood Box with Plastic Liner (Flower/plant is not included) (Sell in Set of 4 Boxes)
3. Cut the Wood to Size
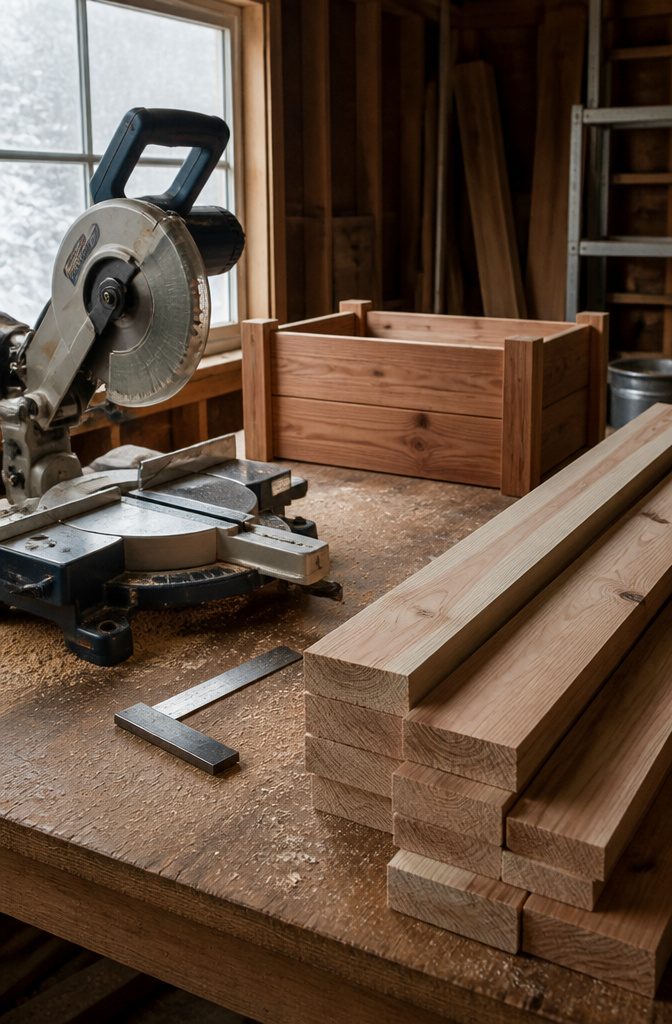
A miter saw gives you the clean, square cut that makes planter boxes sit flat and look finished. I reach for one whenever the board is long enough to feed through safely and the cut line is straightforward.
The 10" blade handles most cedar pickets and 2×4 stock without trouble; a 12" sliding saw covers wider boards if you already own one.
Setup time and space are the real costs. For a single window box or a small set of planters, hauling out the miter saw, setting up stops, and clearing the work area can eat half your morning.
That is where a hand saw earns its keep. A sharp panel saw or a Japanese pull saw cuts cedar and pine cleanly if you take your time and use a simple miter box or a carefully squared guide.
Speed and shoulder work are what you give up: six identical cuts by hand will slow you down, and fatigue shows in the last cut.
For anything under four cuts, I grab the hand saw and a speed square; for a full raised bed with matching sides, the miter saw justifies its setup.
Either way, cut one piece to your measured length, check it with a carpenter’s square, then use it as a template for every matching piece. That template step is what keeps your planter square and your joints tight.

Natural Thick Coco Fiber Liner: These trough coconut fiber liners crafted from natural coco fibers, offer excellent breathability and water retention. They keep the soil moist and promote healthy plant growth, making them a sustainable choice for agriculture and gardening, improving soil quality and plant conditions

100% NATURAL & ECO-FRIENDLY – Made from pure, hand-woven coconut husk fiber. Completely biodegradable—from source to soil—with zero plastic or chemicals. A sustainable choice for eco-conscious gardeners and pet owners.

High-Quality Material: Made of ultra-durable non-woven fabric, this piece of landscape fabric is the perfect liner for the Large Vegetable Tank Outdoor Large Raised Bed. The liner is porous enough to allow excess water to drain and tough enough to stop soil from escaping
4. Assemble the Planter
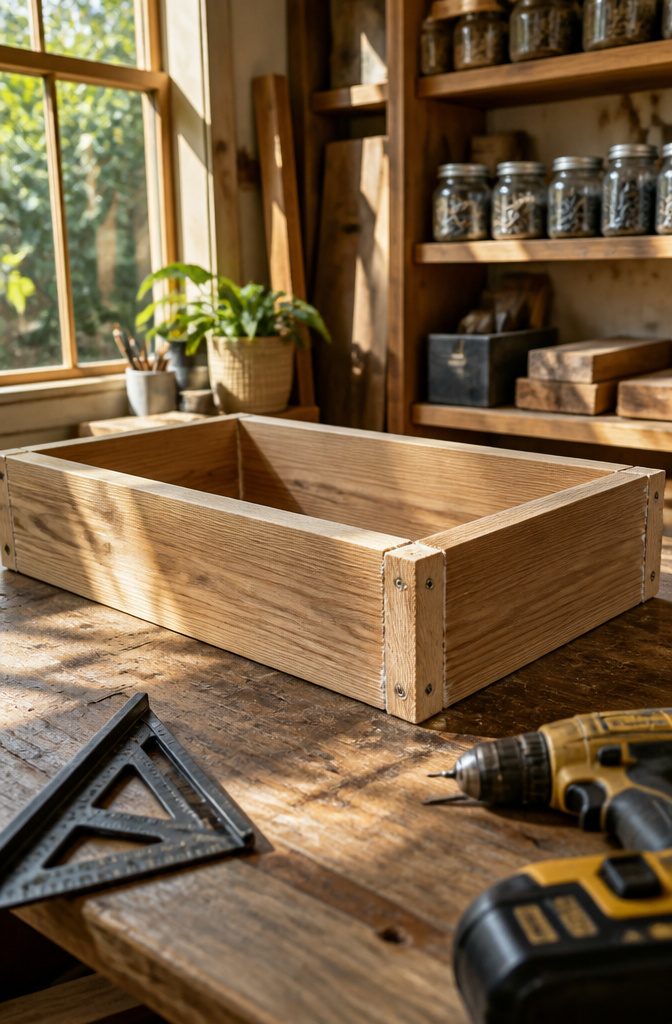
Lay the pieces on a flat surface with the ends butted together and a set square pressed into every corner before you drive a single fastener.
A frame that starts out of square only gets worse once soil and water add weight. For the joints themselves, stainless steel screws win over nails every time outdoors, since rust is not a question of if but when.
Drill pilot holes about 2.5 mm from the ends to keep the wood from splitting, then drive 7.5 mm screws for stick timber or two self-tapping decking screws placed ¾ inch from top and bottom when working with decking boards.
Wood glue on the joints before you screw adds rigidity the fasteners alone will not give you, especially on taller planters where the sides act like lever arms.
I use glue on every joint I can clamp, but I would not trust it as the only bond on anything that holds damp soil through freeze-thaw cycles.
Nails go faster, which matters if you are knocking together a temporary bed from scrap, yet they loosen as the wood swells and shrinks.
For a planter meant to last past this season, screws let you back one out and snug it again if a joint gaps open.
Where the long sides meet the ends, an extra screw driven from the back side through into the end piece locks the corner without showing metal on the face.

Innovative Space-saving Design: maximize your gardening potential with our stackable wall planter system; Each piece measures 9.45" x 5.71" x 5.51" and features two pockets, The overall dimensions are 47.5"x33"x5.5" offering ample growth space for a variety of plants; Nice for Fence Balcony Wall Decor, these vertical wall planters change limited spaces into gardens effortlessly

【36 Pocket Vertical Garden】Features 36 individual planting pockets, allowing you to grow herbs, flowers, succulents, strawberries, vegetables, and other plants while maximizing vertical space.
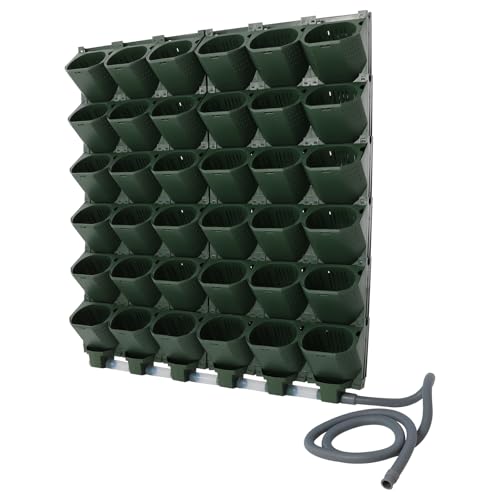
【Smart Timer & Rain Sensor】Equipped with a timer, you can easily set watering intervals (1h-30d) and duration (1s-999m). The intelligent rain sensor (IPX6 water-proof) automatically pauses irrigation on rainy days, preventing overwatering and saving water. Perfect for business trips and holidays.
5. Add Drainage Holes
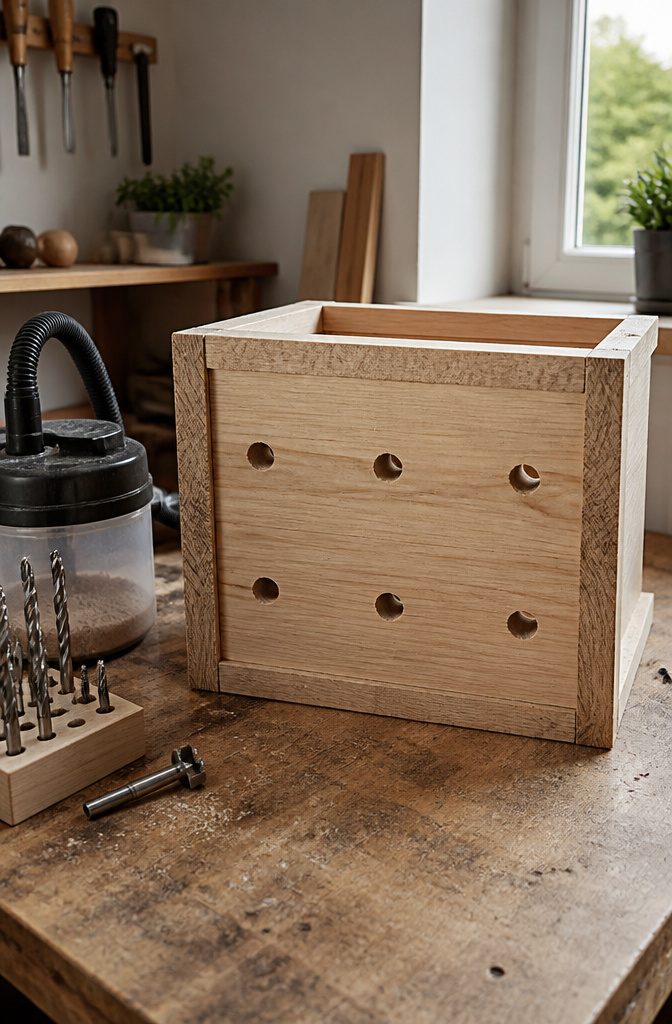
A planter without drainage is a root rot guarantee, so this step deserves exact tooling rather than guesswork. A small planter needs four ¼-inch holes, a medium takes six at ½ inch, and a large needs eight 1-inch openings.
Those sizes scale with the volume of soil each box holds: the small hole count handles weekend herbs, while the single-inch bore on a big box clears the water that collects across two cubic feet of mix.
Too few holes starve outer roots of air even when the center looks damp.
Too small a diameter clogs fast with potting mix, and you find out six weeks later when the lower leaves yellow and the wood starts softening from the inside out.
Space them evenly across the base, keeping the bit back from the edges so you do not blow out the corner joints under load.
I drill from the inside face so the splintering shows on the soil side, not the clean underside you actually look at.

High quality materials.

【Universal Fit for Most Railings】Stop worrying if it will fit! Our adjustable railing planter boxes bracket (made of sturdy, powder-coated iron) securely mounts on any railing from 1.6" to 4.9" wide. This no-drill design protects your property, giving you a stable, custom fit for your balcony, deck, or patio fence.

【Fits Various Railing Widths】This railing planter box works with railings up to 4.9 inches wide and features an adjustable width mechanism. Its compact, detachable support design allows easy disassembly, so you can seamlessly move it from outdoor to indoor use
6. Finish the Planter
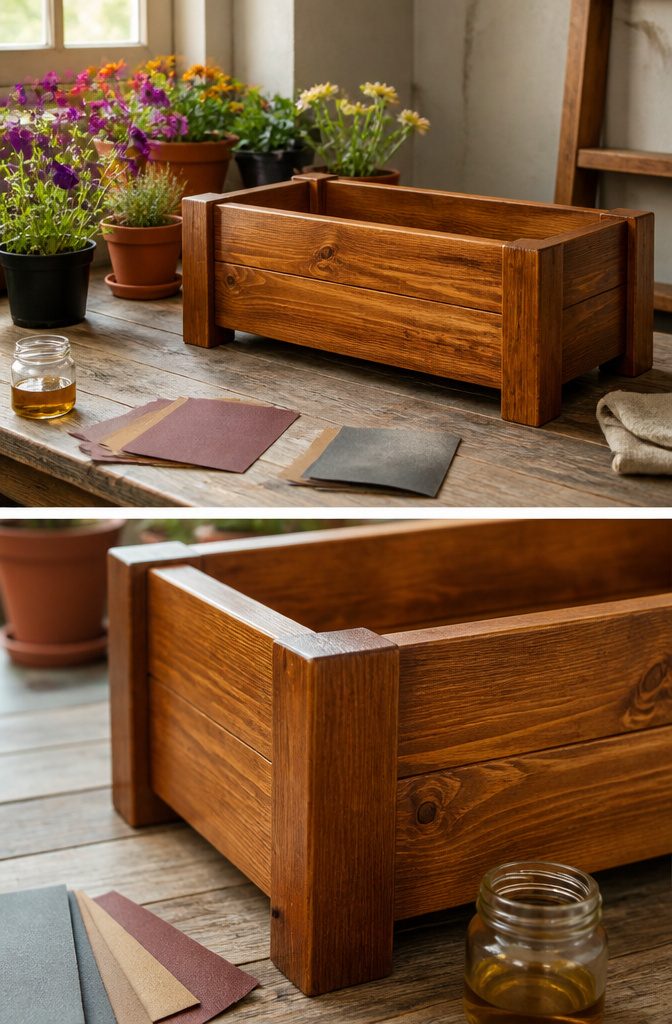
Sanding the edges makes the difference between a planter that looks shop-built and one that looks shop-bought.
A quick pass with 120-grit paper, then 220, removes splinters and rounds the rim just enough that soil won’t catch in the corners. An orbital sander saves time on large boxes; coarse sandpaper and elbow grease work fine for small ones.
For the finish, non-toxic sealant is non-negotiable if you’re growing anything edible. Standard exterior sealants leach chemicals you don’t want near herbs or vegetables.
Mineral oil is food-grade, cheap, and easy to reapply, though it offers less weather protection than a dedicated outdoor sealer. Paint or stain both work: stain soaks in and protects longer, paint sits on top and chips eventually.
Sealing is worth the hour and the $15–$25.
Untreated wood in contact with damp soil starts showing wear within a single season. I’d skip the gray wash trend unless it matches your house; it reads dated faster than natural wood or a solid color.
Raw cedar left bare gains character, but only in dry climates. In most of the US, unsealed planters swell, crack, and need rebuilding sooner than you’d like.

HIGH-QUALITY ACACIA WOOD CONSTRUCTION: Our garden boxes outdoor raised are crafted from durable Acacia wood; The unique wood grain enhances your space, ideal for decorating or growing plants

【A Plant's Dream Home】 Your plants will love this raised garden bed. This flower bed is 40 inches long, 12 inches wide and 12 inches high. Your plants have plenty of room to stretch out their bodies. This wooden planter box allows your plants to blend in with nature in a more harmonious way than a metal one!

Solid Fir Wood Construction for Long-Lasting Durability: Crafted from solid fir wood, our square planter boxes feature a naturally weather-resistant finish that withstands outdoor elements year-round. The rich, unique wood grain adds a warm, rustic charm to any space, making it the durable choice for growing flowers, herbs, vegetables, and succulents, while blending seamlessly with patio, garden, or porch decor.
7. Prepare the Interior
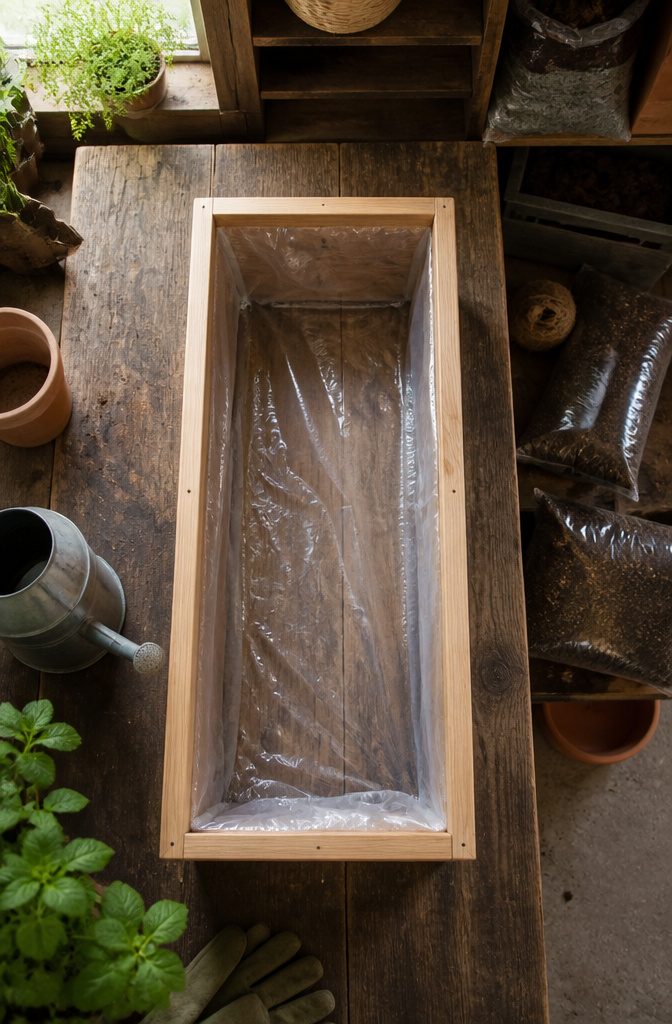
Plastic liner isn’t always worth the trouble.
For a small window box or a planter that sits on a covered porch, bare wood with a coat of exterior sealant on the inside faces handles moisture well enough. I skip the liner there and save the weekend hours.
But for a raised bed built from pine instead of cedar or redwood, or any planter that will hold wet soil against the grain for months at a time, a heavy-duty plastic sheet stapled to the interior walls buys two or three extra seasons before rot sets in.
Some guides suggest laying weed barrier across the bottom as a substitute for drainage holes, claiming the fabric lets water through while blocking soil.
In practice, the barrier drains until the soil compacts, then it pools. I drill holes every six inches across the base no matter what, then add a layer of gravel or broken pottery if I have it on hand.
Fill with a mix that matches the plant, not whatever bag is cheapest. For vegetables, a blend of compost, peat moss, and vermiculite holds nutrients without turning to mud.
For annual flowers, standard potting mix works. Leave two inches of headroom below the rim so water doesn’t slosh out onto the wood when you overdo the can.

Premium Material: Crafted from 100% solid fir wood, our wooden hanging planter delivers a natural rustic texture. Reinforced with 2 heavy-duty iron bands around the waist, it resists warping and maintains stability. Equipped with 2 detachable metal hooks (fits rails up to 2.5"), it easily converts from a railing planter to a standalone tabletop pot (No assembly required for the planter body)

Versatile for Various Railings: This railing planter boxes comes with adjustable brackets that fit railings, walls, fences, etc. up to 4.9 inches wide, offering a space-saving solution. The hanging design helps protect your railings from damage while delivering both beauty and practicality

【Minimalist Design】This railing hanging balcony planter has a modern and minimalist look, suitable for growing various types of plants and flowers, such as herbs, fruits, vegetables, cacti, succulents, ferns, add elegance and natural beauty to your house.
8. Raised Planter Boxes
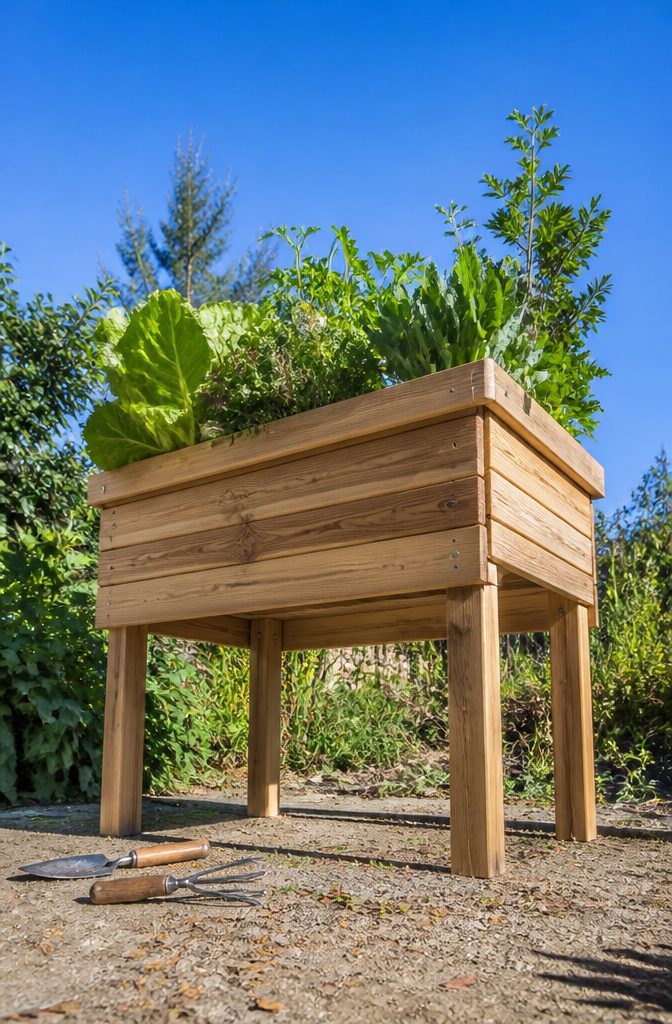
Raised planter boxes sit on legs or a frame that lifts the soil surface to waist height or close to it.
That elevation is the single feature that makes them worth the extra lumber, because it removes the bend-and-reach motion that turns an hour of weeding into a back spasm.
For anyone over fifty, or anyone who already knows what a bad back feels like on a Sunday morning, this is the planter I would build every time.
The frame adds cost and build time. You need four corner posts, cross-bracing to keep the box from racking, and enough depth in the box itself for root systems, which means more boards than a ground-level version.
I would not skip the cross-bracing; a soil-filled box is heavy, and a sagging frame defeats the purpose.
Cedar or another rot-resistant species matters more here, too, because the legs sit in splash range and stay wet longer than the box above.
There is a real cost to this. You spend more on lumber and more on hardware, and you need a level spot or adjustable feet to keep water from pooling on one side.
What you buy back is the ability to garden standing up, which means you actually do it on the days your back is not cooperating. That upright posture is worth the frame.

✅SIZE: 24"/61cm length, 7"/18cm Width, 7"/18cm depth. Trough shape extra thick replacement molded coir liners for window box. The specific size you can view the picture.

Natural Coconut Fiber Roll - Crafted from natural coconut husk fibers, our coco liners are biodegradable and eco-friendly. They're tightly woven for sturdiness and durability, featuring ample drainage holes for proper water retention, drainage, and air circulation to support healthy roots and plant growth.

Black Planter Liner: this set includes 1 versatile coconut fiber rolls, each measuring 30 x 200 cm/ 12 x 80 inches; These liners are sized for a variety of uses, including hanging baskets, window boxes, vegetable pots, fence flower baskets, and wire plant holders
9. Window Boxes
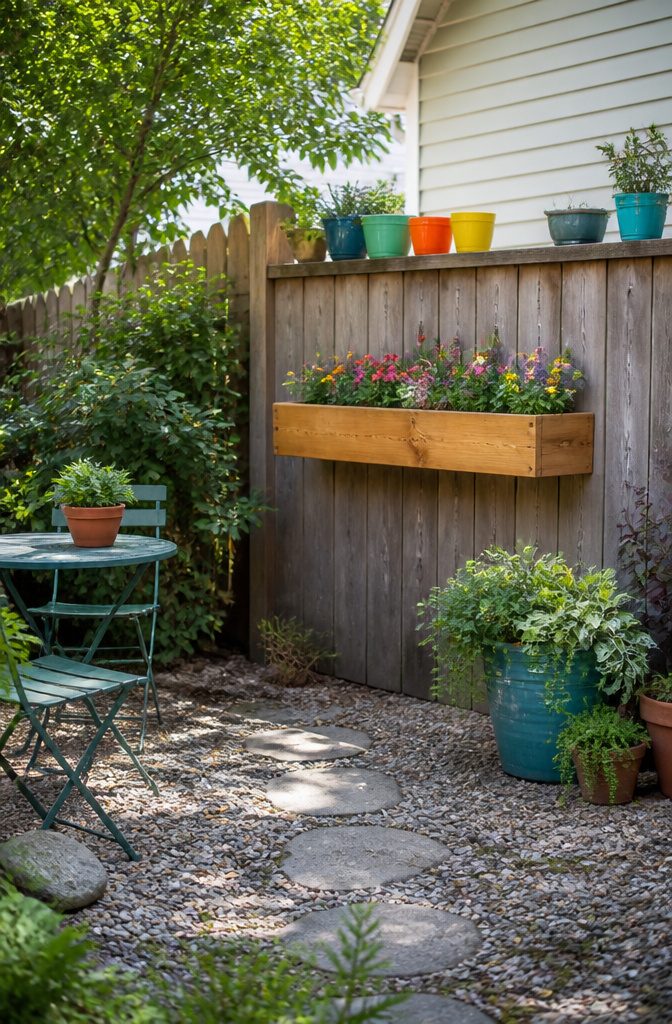
Window boxes are the fastest build in this set, and the one I’d point anyone toward if they only have Saturday morning free.
A basic box needs 1 x 6 boards for the sides, 1 x 3 trim top and bottom, and a 2 x 2 or 2 x 4 frame inside to carry the load.
Cedar dog-eared fence pickets work if you trim the ear off first, and they run cheaper than premium pine, though the cut takes extra minutes.
The hardware matters more than the wood. I would not go above about 40 pounds total weight once soil and plants are wet, and I’d use L-brackets rated for exterior use, not just screws driven into siding.
That limit means a plastic pot liner dropped inside the box, rather than building the box itself to hold soil directly. The liner keeps weight down and the box lasts longer.
You can build this wooden planter box in less than an hour.
That hour assumes you have the pot liner ready and the bracket locations marked.
The jigsaw work is only if you want decorative cutouts; a plain box needs nothing more than a miter saw and a drill. Clay pots slipped inside add color without adding weight you have to trust to the wall.

Space-Saving Solution: Maximize your outdoor space with our sunvara 64 Pocket succulent wall planters, planter wall, vertical farm. Transform any bare wall into a lush vertical garden, ideal for small balconies, patios, or urban gardens.

PREMIUM MATERIAL & WATER-PRESERVING REAR DESIGN - The hanging garden growth bag is made of high-quality and environmentally friendly felt. Practically, this growing bag retain a moderate water level for perfect growing conditions for your plants, such as herbs, strawberries, flowers, vegetables and so on. The rear water-preserving layer of the growing bag effectively protects the wall without stains, and the leakproof design of the bottom does not make your floor dirty.

Innovative Space-saving Design: maximize your gardening potential with our stackable wall planter system; Each piece measures 9.45" x 5.71" x 5.51" and features two pockets, offering ample growth space for a variety of plants; Nice for Fence Balcony Wall Decor, these vertical wall planters change limited spaces into gardens effortlessly
10. Self-Watering Planters
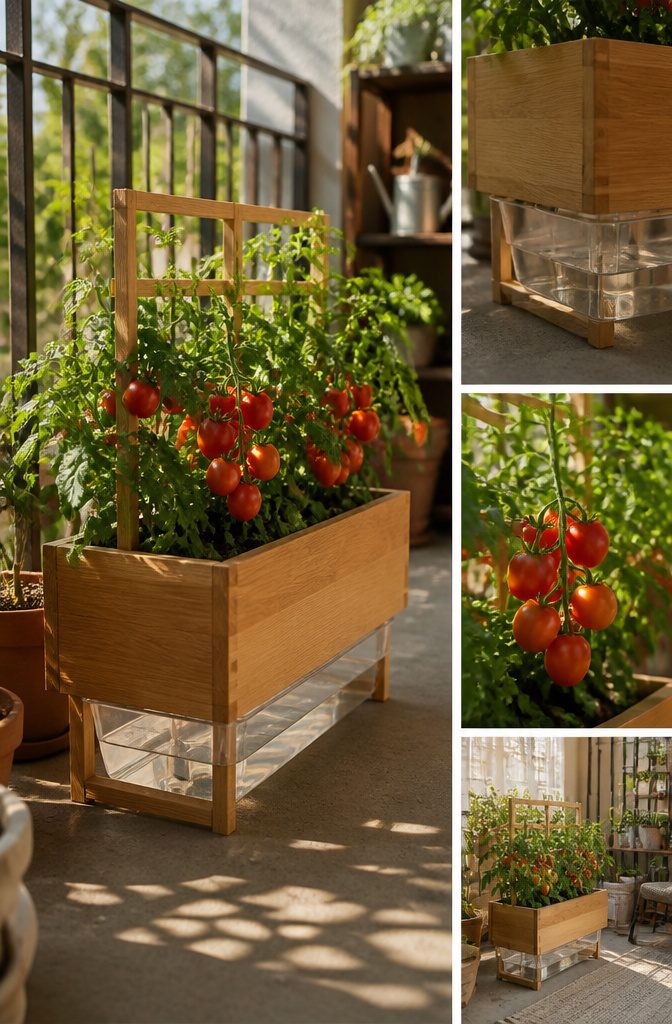
A reservoir system buys you a few days of forgiveness, which is exactly why I usually skip it. The extra carpentry, the lining, the fill tube, and the overflow hole all add time I would rather spend planting.
Still, a south-facing wall in July will bake a box dry by noon, and weekend travelers come home to crisp herbs more often than they admit.
Tomatoes in particular drink hard once fruit sets, so a false bottom holding an inch or two of water starts to look like cheap insurance.
The build means sealing a plastic tray or pond liner into the lower third, drilling the overflow just below your soil line so roots do not drown, and running a PVC fill pipe up one corner.
I would keep the reservoir shallow; deep standing water rots wood faster and breeds mosquitoes you did not invite.
For most planters, I drill generous drainage and water by hand. But if your balcony faces southwest and you fly out every Friday, this is the one upgrade that actually earns its Saturday.

100% Wood Structure: The Flower Planter is made of 100% natural solid wood, which is durable enough to be used for a long time. At the same time, fir will not easily be broken so it is really a good material to be used as a flower pot. In addition, although its structure is light in weight, it has high bearing capacity.

1.【Size】: 16*8*6.5cm/6.3*3.15*2.55 inch, mini size.

Heavy Metal & Coconut Coir Fiber Liner: Crafted from robust carbon steel with a rust-resistant powder coating, large black hanging planter box is strong and corrosion-proof, natural coco fiber promotes healthy plant growth with good breathability and water retention, suitable for year-round planting, both indoors and outdoors
11. Vertical Planters
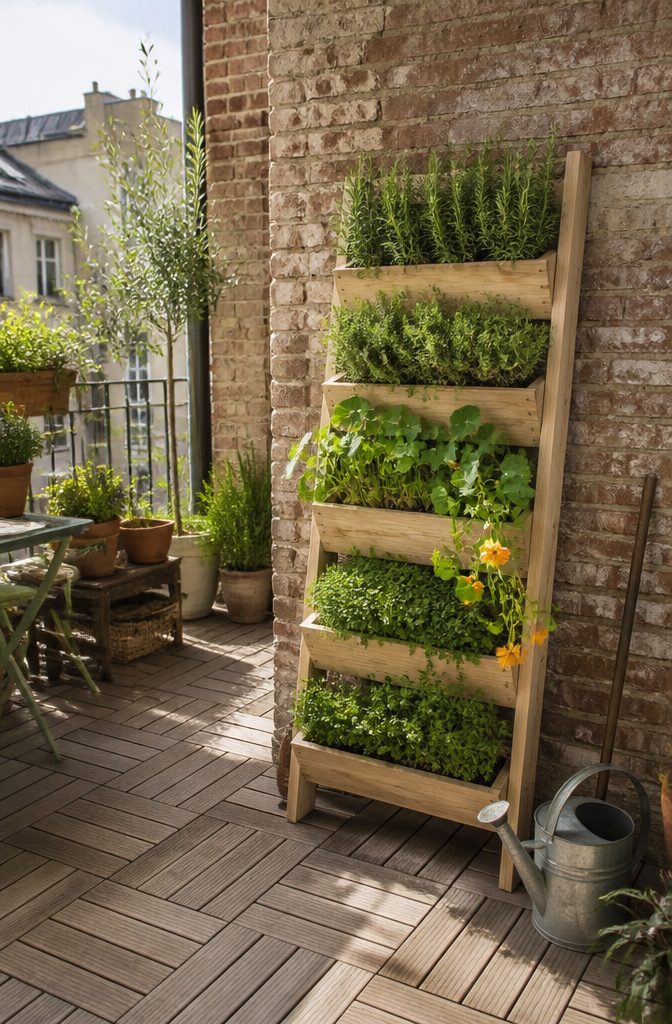
A vertical planter buys back square footage you never had. Wall-mounted slats or a leaning ladder frame turn a bare balcony rail or the narrow side of a garage into growing space.
I would build the pockets shallow, maybe 4–6 inches front to back, because weight adds up fast once soil is wet and the hardware holding it needs to stay put.
Soil depth is the real limit.
Leafy herbs, lettuces, and strawberries manage fine in 6 inches. Tomatoes, peppers, or anything with a taproot will sulk and stay stunted; I would skip them entirely for this setup.
Succulents and trailing nasturtiums handle the dry edge better than moisture lovers, since the top rows drain straight down onto the ones below.
Wall planters dry out faster than anything at ground level.
I would line the back and base with landscape fabric to slow the seepage without trapping standing water. If you are renting, a freestanding A-frame on feet beats screwing brackets into siding you do not own.
12. Trellis Planters
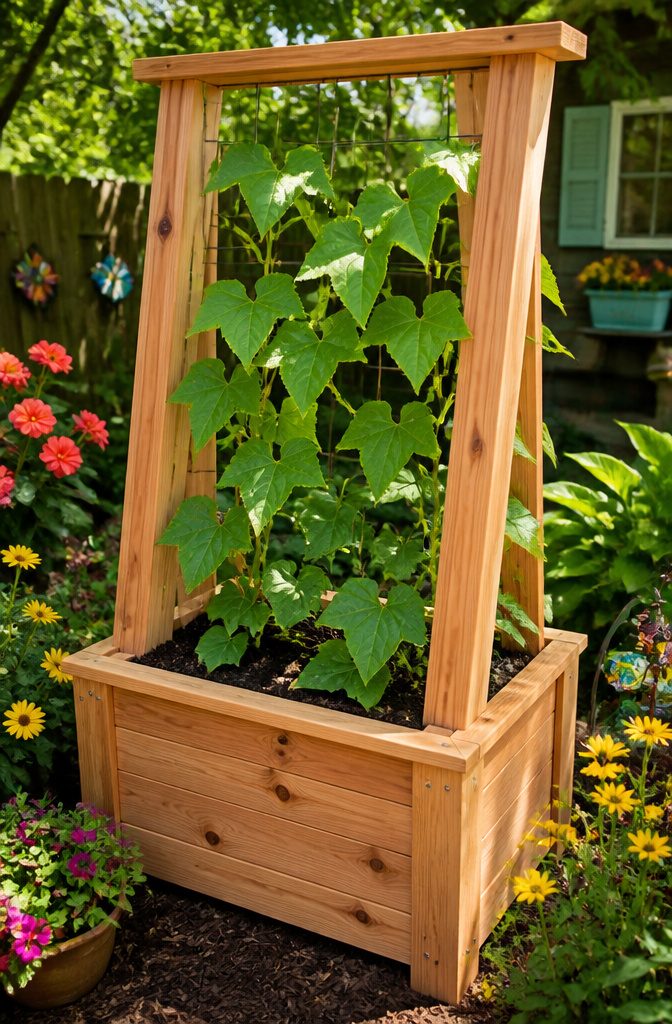
A trellis built into the planter box itself handles the weight of a mature vine far better than anything you zip-tie on later.
I have watched freestanding trellises lean and twist under a full load of cucumbers, their roots too shallow in a separate container to counterbalance the top growth.
One-piece construction lets you sink the uprights deep into the soil bed and screw them through the box sides, so the whole structure works against wind as a single mass.
Cucumbers and peas are the practical choices here, heavy producers that need the lift off the ground to keep fruit clean and harvestable.
Morning glories fill the same frame with something softer, though I would not mix food and ornament in one box; the morning glory’s vigor shades out vegetables by August.
Cedar 1×2s set on edge make light, strong uprights. Angle them slightly outward before fastening, because the tension of climbing vines pulls straight pieces inward over a season.
One person can move the finished planter empty, which matters when you are shifting it to follow sun or dodging a late frost.
Wood Types Compared
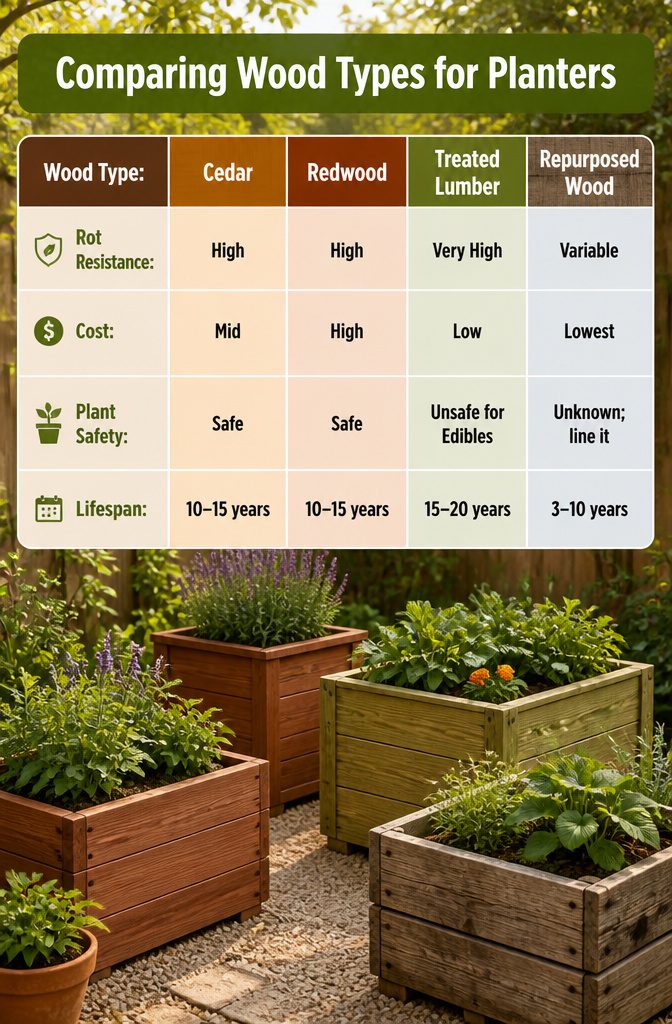
Cedar and redwood are the woods most often recommended for planters because they contain natural oils that resist rot without any chemical treatment.
Treated lumber costs less and lasts longer, but the chemicals used in modern pressure-treating are rated for ground contact, which means they will leach into soil and, by extension, into anything you plan to eat.
I would not grow vegetables in it.
Repurposed wood, whether from pallets or old fencing, is the cheapest route and the most interesting visually, though you are gambling on hidden rot and you will need to line it to keep old finishes or unknown treatments away from roots.
| Rot resistance | Cost | Plant safety | Lifespan | |
|---|---|---|---|---|
| Cedar | High | Mid | Safe | 10–15 years |
| Redwood | High | High | Safe | 10–15 years |
| Treated lumber | Very high | Low | Unsafe for edibles | 15–20 years |
| Repurposed wood | Variable | Lowest | Unknown; line it | 3–10 years |
If I were building one planter to last, I would pick cedar. It splits the difference between redwood’s price and treated lumber’s drawbacks, and it weathers to a soft silver-gray that looks intentional rather than neglected.
For a renter or anyone testing whether they will actually maintain a garden, repurposed wood is the right call; you are out almost nothing if the project fizzles.
Treated lumber only makes sense for purely ornamental plantings where cost matters more than any other factor.
Drill, Saw and What Else You Need
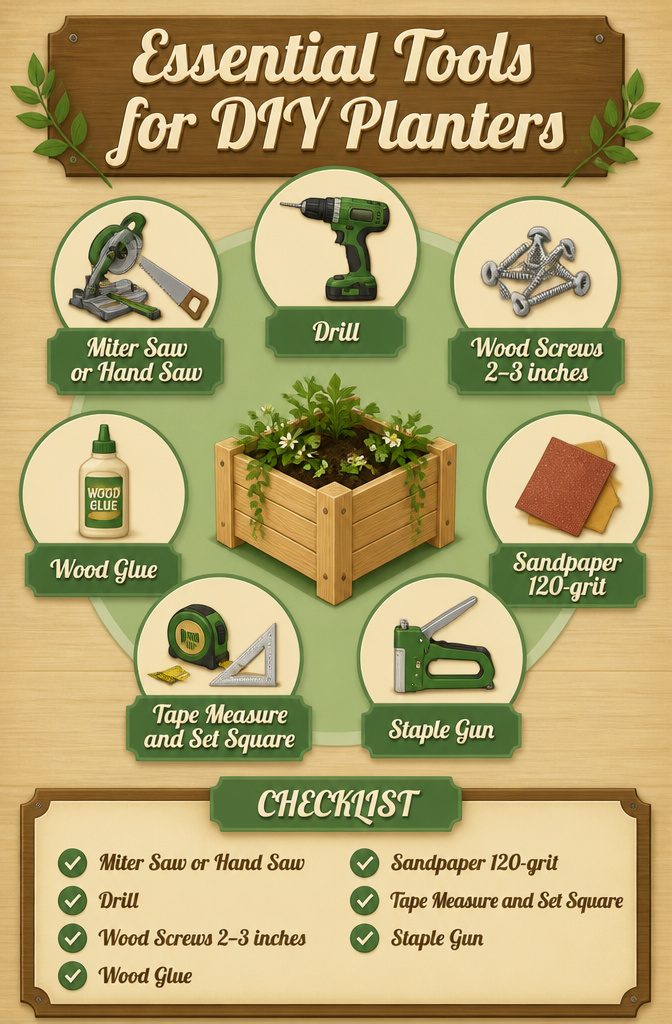
A planter that lasts does not require every tool on a woodworker’s wish list. A few basics, borrowed or bought, cover every project in this article.
- A miter saw or hand saw handles every cut. The miter saw saves time and keeps angles square; a hand saw works fine if you measure twice and clamp a straightedge as a guide.
- A drill drives the screws that hold the box together. An electric screwdriver speeds things up, but the drill is the one you cannot skip.
- 2- to 3-inch wood screws suit the 2×2 or 2×4 interior frames most planters need. Match the screw length to your lumber so points do not poke through.
- Wood glue on every joint before you screw adds rigidity the fasteners alone cannot give.
- Sandpaper, 120-grit or finer, smooths the faces that touch soil and the edges you will brush against on a balcony. An orbital sander is a luxury; hand sanding takes ten minutes longer and costs nothing to borrow.
- A tape measure and a set square keep the box from ending up rhombus-shaped. One skewed corner throws off every other joint.
- A staple gun secures landscape fabric or plastic liner inside the planter. A hammer and tacks work in a pinch.
If the budget allows one purchase, make it the miter saw. Clean, square cuts are the detail that decides whether the planter looks built or cobbled together.
Borrow the sander. Buy the glue, screws, and sandpaper; they are cheap and you will use the leftovers.
Soil and Drainage Basics
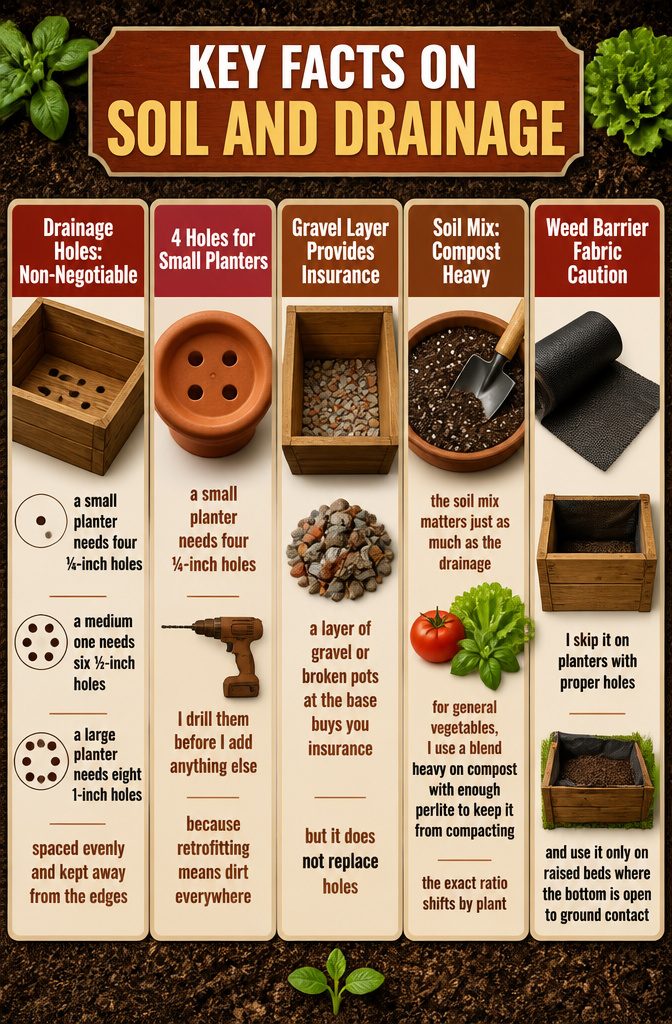
Root rot is the fastest way to kill a planter project, and it starts with water sitting against the roots instead of moving through.
Drainage holes are non-negotiable: a small planter needs four ¼-inch holes, a medium one needs six ½-inch holes, and a large planter needs eight 1-inch holes, spaced evenly and kept away from the edges.
I drill them before I add anything else, because retrofitting means dirt everywhere.
A layer of gravel or broken pots at the base buys you insurance, but it does not replace holes. The soil mix matters just as much as the drainage.
For general vegetables, I use a blend heavy on compost with enough perlite to keep it from compacting; the exact ratio shifts by plant, but tomatoes want more drainage than lettuce, and herbs want less richness than squash.
Weed barrier fabric is where I split from some builders.
It keeps soil from washing out the holes, which sounds useful, but in a wooden box it can also trap moisture against the wood and slow the very drainage you built for.
I skip it on planters with proper holes and use it only on raised beds where the bottom is open to ground contact.
The fabric drains, yes, but wood rots faster when it stays damp; I’d rather lose a little soil through the holes than replace the box in two seasons.
Scrap Wood and Other Ways to Spend Less
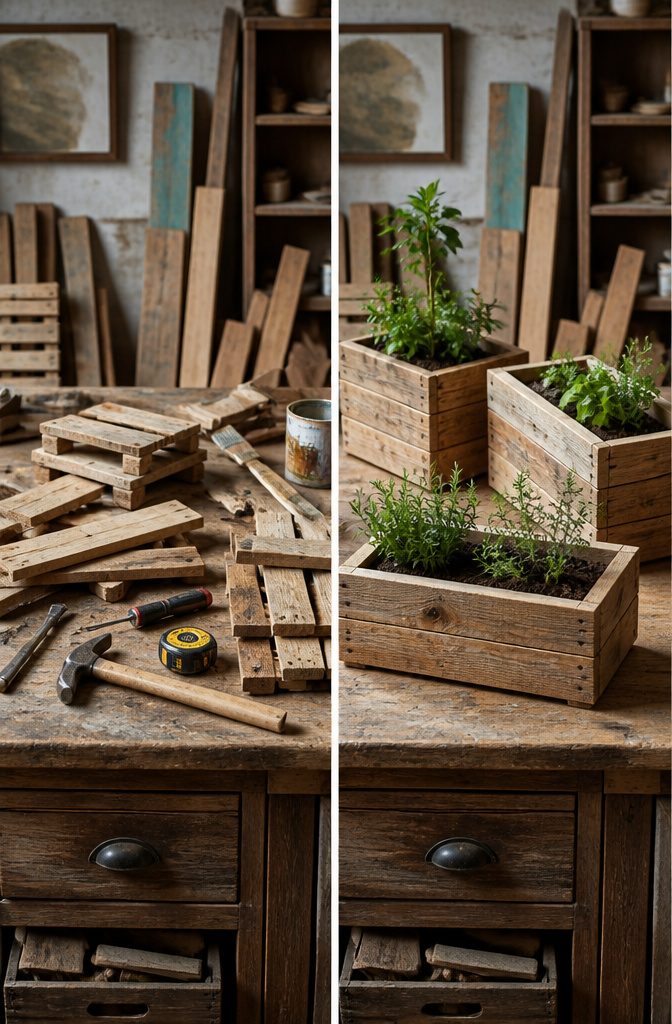
Scrap wood is where most of my planter builds start, and where the budget either holds or breaks. Knowing what to trust is what matters.
Pallets marked HT, heat-treated, are fine for planters; pallets marked MB were fumigated with methyl bromide and belong nowhere near soil or food. I skip those entirely, no matter how free they are.
Old deck boards are another story: every nail hole needs checking, because moisture collects there and rot starts from the inside out. I have passed on boards that looked solid until I pried one free and found the center punky.
Constructional timber off-cuts and leftover 1 x 6 boards from a fence or trim job are the safer bets. They cost nothing if you already have them, and they save the trip to return uncut boards to the hardware store.
For the planter floor, a scrap piece of plywood or a few 1 x 2 boards laid across cleats work equally well.
I would not build the whole box from plywood, though; it delaminates faster than solid stock when water sits against it.
The real savings come from being picky about what you haul home. Free wood that rots in one season costs more than buying a 1 x 6 board once.
Frequently Asked Questions
What type of wood is best for a DIY wood planter?
Cedar and redwood are the best choices because their natural oils resist rot and insects without chemical treatment.
Cedar costs less than redwood and still lasts 10–15 years, which makes it the practical pick for most builds. Pressure-treated lumber lasts longer but leaches chemicals into soil, so skip it for anything edible.
Do I need to seal my DIY wood planter?
Yes, sealing adds roughly $15–$25 and an hour of work, but untreated wood in contact with damp soil starts breaking down within one season.
Use a non-toxic sealant for edibles; mineral oil is food-grade and cheap to reapply, though it offers less weather protection than outdoor sealers. Standard exterior sealants are fine for ornamental plantings only.
How do you keep wooden planters from rotting?
Start with rot-resistant wood like cedar or redwood, then seal all surfaces that touch soil. Drill drainage holes before adding soil: four ¼-inch holes for a small box, six ½-inch for a medium, eight 1-inch for a large.
Skip weed barrier fabric, which traps moisture against wood; proper holes and a thin gravel layer work better.
How to make a small planter out of wood?
A 4′ × 2′ box is the smallest size worth building; it holds 12–16 plants and fits walkways or crowded balconies without looking oversized.
Cut boards to length with a miter saw or hand saw, butt the ends together on a flat surface with a set square in every corner, then fasten with stainless steel screws and wood glue.
Drill four ¼-inch drainage holes through the base before filling.
What are some good ideas for planters for my garden?
Each suits different spaces and physical needs; raised boxes on legs are best for anyone who wants to garden standing up.
What do you put in the bottom of a wooden planter box?
A layer of gravel or broken pottery helps drainage, but it does not replace holes drilled through the base. Skip weed barrier fabric, which clogs and traps moisture against wood.
Fill with a mix matched to your plants: compost, peat moss, and vermiculite for vegetables; standard potting mix for annual flowers. Leave 2 inches of headroom below the rim to prevent overflow.
Do wooden planters need a bottom?
The exception is raised beds open to the ground, where the soil beneath handles drainage directly.
For any planter with a bottom, drill holes before adding soil: four ¼-inch for small, six ½-inch for medium, eight 1-inch for large, spaced evenly and kept back from the edges.